
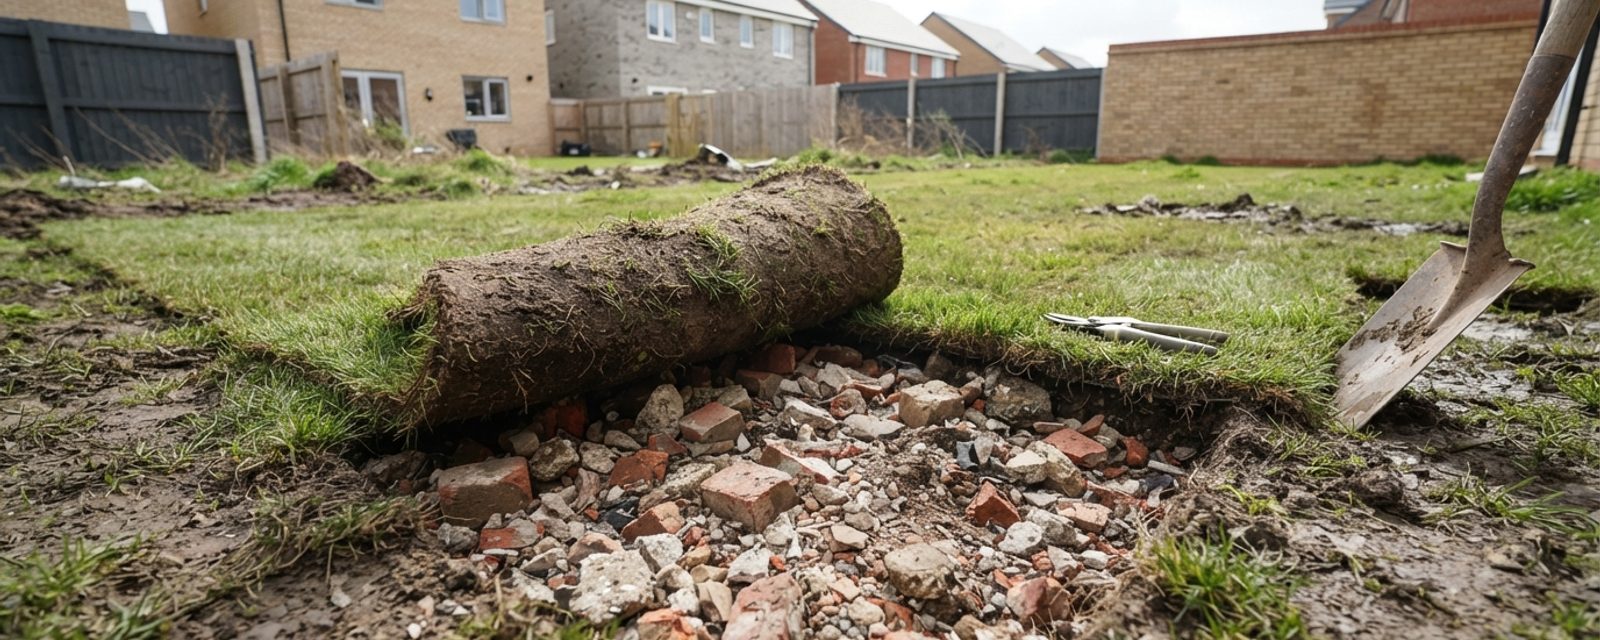
The turf looks fine. The seller called it "landscaped." Then the first rose goes in, or the first attempt at a vegetable bed, and the spade stops dead four or five inches down, not on a root or a stone, but on something solid and continuous. Or nothing stops the spade, but nothing grows either: bedding plants sit and sulk, a new lawn greens up in the first fortnight and then thins and yellows through the summer, and nothing about the surface explains why.
Both of these are the same problem. Under a thin skim of imported topsoil or relaid turf, the ground is consolidated hardcore, builders' rubble, or heavily compacted subsoil left behind once construction traffic has finished with the site. It is a specific, common condition on new housing developments, and it doesn't respond to the usual first-year fixes.
Why this isn't the same problem as heavy clay
It's tempting to file this under "difficult soil" and reach for the same advice as ordinary heavy clay. That advice is good once you have workable ground, but a new-build plot is often starting from a different place entirely, and two things separate it from ordinary clay.
First, the mechanism: ordinary heavy clay is difficult because of the physical make-up of the clay particles themselves, fine, platy particles that pack together and drain slowly, everywhere on the site, at whatever depth you dig. A new-build plot is compacted because of what happened to it during construction, repeated passes of heavy machinery, stacked materials, and consolidated hardcore pressed down before anyone thought about what would grow there. On a new-build site, existing topsoil is typically stripped before building work starts, and construction traffic then compacts the exposed subsoil it's stripped down to; debris and surplus aggregate is often buried under whatever soil is brought back in to landscape the plot afterwards. That's a mechanical, one-off compaction event layeredPropagating a new plant by pinning a low, flexible stem into the soil while still attached to the parent, so it roots before being cut free. Full definition → with buried material, not an intrinsic property of the ground.
Second, the depth of workable soil: heavy clay is difficult but present, you can dig into it, however hard the going. A new-build garden often has only a few centimetres of imported or relaid topsoil sitting directly on rubble or a compacted pan, meaning there may be almost no depth of usable soil at all until something is done about what's underneath it.
That has a practical consequence. On ordinary clay, you can improve the soil you've got, dig in organic matter, switch to no-digA growing method that avoids turning the soil over, building fertility instead by adding organic matter on the surface. Full definition →, manage drainage. See improving clay soil and no-dig gardening on heavy clay for that stage. On a rubble-subsoil plot, soil-improvement technique isn't the first move, because there often isn't enough soil to improve yet. Physical work, removing, screening, or breaking up what's underneath, usually has to happen first, and only then do the standard heavy-soil techniques become relevant. Scotland's Soil Framework identifies construction leading to soil sealing as one of the threats to Scottish soils it specifically tracks, alongside compaction and loss of structure from cultivation, the underlying ground being altered by building work, not just by what's naturally there, is a recognised issue rather than a one-off bad luck story.
Assessing what's actually under the turf
Don't guess from one spot. A garden that's had material dumped and levelled during landscaping can vary hugely across its width, workable soil by the back fence, solid rubble two metres away where a site cabin or a materials stack once stood. Work through these five checks at each spot you test.
Before digging anywhere, check for buried services. A new-build plot has fresh electricity, gas, water and telecoms connections running through it, often shallower than an established garden's, and a spade or fork through a cable or pipe is a real risk, not a theoretical one. Check the house's own build plans if you have them, and use a cable/pipe locator or a free service such as LinesearchBeforeUdig before the first test pit goes in, not after.
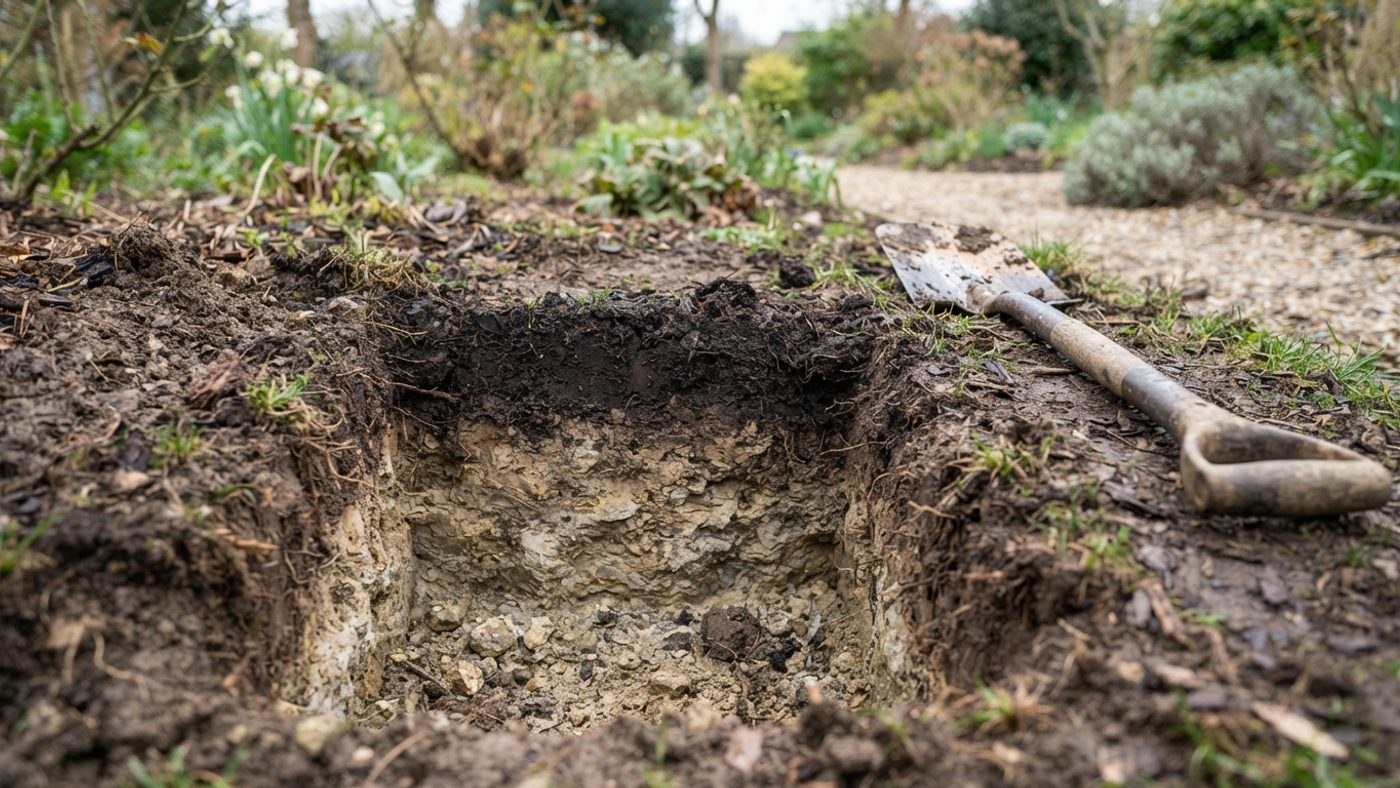
- Dig test pits, not just a planting hole. At three or four points around the garden, near the house, at the mid-point, and at the boundary, dig a hole roughly 30-45cm (12-18in) across and as deep as you can manage with a spade. Note where the spade meets serious resistance, and what that resistance is: continuous stone and broken concrete reads as rubble; a sudden dense, structureless layer that a spade bounces off but doesn't break into reads as a compacted pan rather than rubble as such.
- Check topsoil depth at each pit. Where usable, crumbly, dark soil stops and pale, dense subsoil or hardcore starts is your real topsoil depth, not the label on the turf. A few centimetres over rubble is a very different starting point from 20-30cm of genuine topsoil over compacted-but-rubble-free subsoil; the two need different remediation.
- Run a drainage (percolation) test in each pit. Once a hole is dug to 30-60cm, pour it full of water and cover it to keep rain out. If the water is still standing after several hours, or is still there the next day, the ground beneath is not draining, either because of the rubble layer itself or because of a compacted pan sealing it. Surface puddling after rain is a visible version of the same warning sign, and it's often present before you've dug anything at all.
- Don't stop at one satisfactory hole. A test pit that comes up clean by the patio doesn't mean the far end of the garden is the same; where a garden has been reshaped and back-filled during a build, different areas can have been treated completely differently by different contractors at different stages.
- Know the third option: natural glacial till, not rubble or a construction pan at all. In many parts of Scotland, what a test pit hits below the disturbed topsoil is glacial till, often called boulder clay, a naturally dense, unsorted mix of clay, sand, gravel and stones laid down directly by ice sheets and already "overconsolidated," meaning tightly packed, before any builder arrived. Hard-going ground below the topsoil isn't necessarily proof of construction damage; it may be the site's natural subsoil, which needs the same slow, patient improvement as any heavy natural ground rather than the excavation a rubble layer calls for. The distinction matters for which remedy is worth the effort: continuous broken concrete, brick or aggregate is rubble to remove; a uniform, stony, clay-rich mass with no man-made fragments in it is more likely natural till.
Also worth a look: what the rubble actually is. Broken brick, concrete and stone are the ordinary case. Fragments of plasterboard are worth treating differently if you spot them, since plasterboard breaks down to release sulfate that can harm roots and, mixed with certain soils, produce hydrogen sulfide gas; pick out anything that looks like plasterboard rather than leaving it to break down in a bed. If a plot has any history as previously developed or industrial land rather than open fields, it's also worth finding out what that history was before assuming buried material is limited to ordinary construction debris.
A patch that refuses to grow anything at all, and comes up as ordinary soil rather than rubble when tested, points to a different problem: concrete mixing and washout areas are common on a construction site, and the highly alkaline residue they leave behind scorches roots and skews soil pH for years afterwards. That calls for a pH test and an acidifying or soil-replacement fix, not the excavation a rubble layer needs.
For the general method of identifying your soil's texture once you're down to real soil, the ribbon test, sand-vs-clay-vs-silt feel, see identifying your soil type. A new-build garden's ground has usually been stripped, moved and recompacted during construction, so it may not match the area's expected natural profile until it's had years to settle.
What not to bother trying
Some standard advice is worth skipping entirely on a rubble-subsoil plot, because it treats symptoms that aren't the actual problem.
Surface amendment alone. Digging organic matter into the top few centimetres, mulchingA layer of material spread over the soil around plants to suppress weeds, retain moisture, and improve soil structure as it breaks down. Full definition → heavily, or top-dressingAdding fresh compost, feed or grit to the soil surface around an established plant, rather than digging it in. Full definition → a struggling lawn does nothing for a rubble layer or a compacted pan sitting below it. It can improve the very top layer cosmetically for a season while the underlying blockage stays exactly as it was.
Testing pH or nutrients before dealing with the physical obstruction. A nutrient or pH test is only useful once you're confident the roots can actually get through the ground to use what's there. Testing chemistry on soil that's sitting on solid rubble is solving the wrong problem first.
Assuming a green lawn means it's working. New turf or grass seed can green up convincingly on a very thin skim of soil over compacted ground, because there's just enough moisture and nutrient near the surface to get started. It's only as roots try to go deeper, and as the first dry spell or the first winter tests it properly, that thin, rubble-backed turf fails, patchily, unevenly, and often long after anyone would think to blame the ground underneath rather than the grass seed or the weather.
Rotavating a whole garden without checking what's in it first. Power cultivation is a reasonable option on genuinely soil-only ground, but rotavating blind over a site that may have buried rubble and wire risks wrecking the tool and doesn't break up hardcore in any case; and on clay in wet weather a rotary cultivator can do the opposite of what you want, smearing the soil into a compacted pan under the blades rather than loosening it.
Ranked remediation options
Which option makes sense depends on what the test pits actually showed, not on habit or on what looks tidiest. As a rough guide:
| Option | Best when | Relative cost/effort | Time to usable ground |
|---|---|---|---|
| Excavate and screen out rubble, replace with topsoil | Rubble is shallow (top 20-30cm) and widespread; you want the whole garden usable for planting, not just raised sections | Highest effort; significant cost if hiring plant/skips or buying screened topsoil in volume, lower cost if done by hand in stages over time | Immediate for the areas completed, each excavated bed is usable as soon as it’s backfilled and settled |
| Deep cultivation / subsoiling to break up a compacted pan (no major rubble) | Test pits show a dense compacted layer rather than solid rubble, soil is present but sealed shut | Moderate effort; a tool hire subsoiler or a lot of fork work, no material disposal cost | Faster than full excavation across a whole garden, but structure needs a growing season or more to recover before it behaves like normal cultivated ground |
| Raised beds built on top of the existing ground | Rubble is deep, extensive, or expensive to remove; you need growing space now and can accept a limited footprint | Lowest effort for the depth of usable soil gained; ongoing cost of imported topsoil/compost to fill them | Immediate, plantable as soon as built and filled, but only within the bed itself |
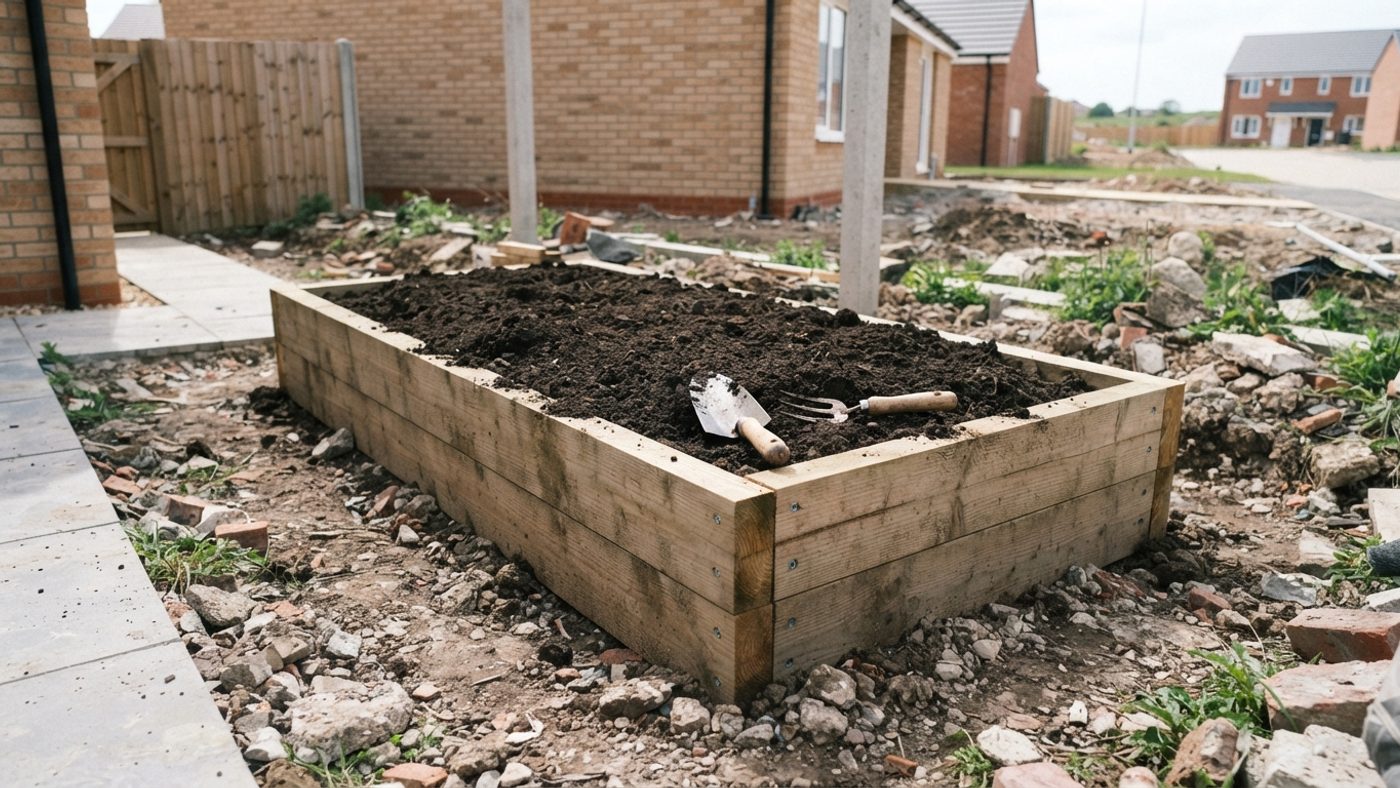
None of these are mutually exclusive across a whole plot: a common realistic pattern is raised beds for vegetables and immediate colour in year one, while excavation or subsoiling of the rest of the garden happens in stages over the following one to three years as budget and energy allow. Where some rubble is left in place deliberately rather than fully excavated, for instance under a raised bed or a shallower-than-ideal dig, a permeable membrane laid between the rubble and the new topsoil stops stones and debris migrating back up to the surface over time, which frost action and worm activity both do gradually otherwise.
Once ground has been excavated and refilled, or a compacted pan has been broken up, the techniques for improving ordinary heavy clay, bulky organic matter, avoiding cultivation when wet, not adding sand, apply in exactly the way they would on any other heavy-soil garden; the guide to improving clay soil covers that stage in detail.
No-dig gardening is a genuinely good ongoing approach for a bed once it's workable, building structure by leaving it undisturbed and mulching from above, but it is a maintenance method for soil you already have, not a way to deal with buried rubble underneath it. Putting a no-dig mulch layer over unremediated hardcore treats none of the actual problem; the no-dig guide for heavy clay assumes you're starting from soil, not rubble.
Removing genuine rubble in any quantity is a waste-disposal question, not just a gardening one. Anyone who produces waste, including a householder clearing hardcore out of their own garden, has a legal duty of care under Scotland's own waste rules, enforced by the Scottish Environment Protection Agency (SEPA), to pass it only to an authorised carrier or a licensed facility, not to whoever's cheapest with a van. Worth checking before a skip or a "man with a van" is booked, not after.
A realistic timeline
This is very rarely a one-season job across a whole new-build garden, and it's worth planning for that rather than being discouraged partway through.
| Stage | Work itself takes | Before it's genuinely settled/reliable |
|---|---|---|
| Raised beds | Days to build and fill | Usable almost immediately; no settling wait |
| Subsoiling/de-compaction (no major rubble) | A weekend to a few weeks, depending on area | A full growing season, sometimes two, for the loosened structure to hold together and drain properly |
| Full excavation and screening, per section | Immediate use once a section is backfilled | A whole garden done this way, in stages, commonly runs one to three years |
| Lawns, on top of whichever path above | — | Its own separate season or more, a lawn only shows whether the ground underneath actually worked once it’s been through a full dry spell and a full winter |
Planting into freshly de-compacted or freshly backfilled ground the same week it's worked rarely goes as well as waiting: loose, recently disturbed ground has more air pockets than settled soil, and repeated winter freezing and thawing of the water in those pockets can heave new roots and lift small plants before they've anchored properly, the same mechanism that damages an autumn-planted bed generally, just worse on ground that hasn't settled at all yet. That risk is worth taking more seriously wherever the local workable spring window opens later, since newly worked ground has less time to settle before the next planting slot arrives, check the region's own frost dates rather than assuming a fixed date applies everywhere. Letting de-compacted or refilled soil sit through a full autumn and winter before planting into it gives it time to consolidate and reduces that risk.
Spring and autumn remain the better windows for cultivation work and for sowing or planting once ground is ready. The Scotland frost-date guide has the fuller regional picture for how that workable window narrows further north and west.
It's worth checking any new-build warranty or developer defects-period paperwork before spending money on remediation, landscaping is sometimes covered for a limited window after completion, and a claim under that cover, where it still applies, can cost less than doing the work yourself.
It's also worth planting with the staging in mind rather than in spite of it: a bed you already know will be dug up and excavated within a year or two isn't the place for anything you'd mind losing, so use raised beds or containers for anything worth the investment until a section's remediation is actually finished.
Common questions
A patch of ground refuses to grow anything at all, even weeds, what else could it be beyond rubble?
Concrete mixing and washout areas, common on a construction site, leave patches of highly alkaline ground that scorch roots and skew pH for years after the build, distinct from the physical blockage a rubble layer causes. If a test pit in that patch comes up as ordinary soil rather than rubble, a pH test is worth running there specifically, since the fix (acidifying or replacing the topsoil) is different from excavating hardcore.
Can I just build raised beds over rubble and skip dealing with what’s underneath?
For growing space, yes, raised beds are the fastest route to usable soil and don’t require moving the rubble at all. What they don’t do is fix drainage or usability for the rest of the garden outside the beds themselves; a garden that’s entirely raised beds because the ground beneath was never dealt with is a valid long-term choice, but it’s worth making deliberately rather than by default.
Is it worth getting a soil test before doing anything else?
Not as the first step on ground that hasn’t been assessed for rubble or compaction. A pH or nutrient test tells you about soil chemistry, which only matters once roots can physically get through the ground to reach it. Dig test pits and check for rubble and drainage first.
Will a rotavator sort out compacted new-build subsoil?
Not reliably, and it can make things worse. Power cultivation doesn’t break up rubble, risks damage from buried debris and wire, and on clay in wet conditions can compact a pan into the soil under the blades rather than loosening it. It’s a reasonable tool once you know the ground is rubble-free and simply compacted, dry enough to work, and needs loosening rather than excavating.
How long before a new-build garden feels like a normal, workable plot?
For a whole garden tackled in stages, some excavation, some raised beds, some de-compaction, a realistic span is one to three years rather than one season, with usable growing space (via raised beds or the first excavated sections) available much sooner than that.
Sources
7 sources, recorded with what each was used for
- RHS: Transforming a New-Build Garden: Topsoil removal and construction-traffic subsoil compaction on new-build sites, double digging as a remedy, rotavating cautions, organic matter application rate, topsoil quality note, autumn/winter cultivation and autumn/spring planting timing
- RHS: Double Digging: Double digging’s purpose (compaction below normal digging depth of 25cm/10in, poor drainage), method, and the test-pit-and-overnight-drainage check before deciding between single and double digging
- RHS: How to Install Garden Drainage: The percolation/drainage test method (30-60cm hole, cover, check for standing water after hours or days), surface puddling as a sign of compaction
- Soil Association: Make Your Own Compost: Green/brown material ratio and the 4-months-to-over-a-year compost maturation timeline referenced in the clay-soil follow-on stage
- Scottish Soil Framework (gov.scot): Construction leading to soil sealing identified as a recognised threat to Scottish soils, alongside compaction and structural loss from cultivation
- British Geological Survey: Glacial Till (Boulder Clay): The definition of glacial till as an unsorted, overconsolidated mix of clay, sand, gravel and boulders deposited directly by ice sheets, distinguishing naturally dense Scottish subsoil from construction-compacted or rubble-laden ground
- gov.scot: Managing Controlled Waste, Duty of Care Code of Practice: The legal duty of care requiring anyone disposing of waste, including a householder, to pass it only to an authorised carrier or licensed facility