
Seeds don't germinateA seed sprouting: breaking dormancy and putting out its first root and shoot, given the right warmth and moisture. Full definition → on a calendar date. They germinate when the medium around them holds enough warmth and enough moisture, consistently, for long enough. A windowsill fails that test twice over: night temperatures behind single glazing can drop several degrees once the heating goes off, and whatever warmth is there comes from one direction, so seedlings stretch toward the glass instead of growing stocky.
An unheated cold frame or porch fails it a different way, no heat source at all, so it simply tracks the outdoor night temperature, which in a Scottish spring is often still below the point most seeds need to get going. A proper seed-starting station fixes all three variables, light, warmth, humidity, independently and holds them steady, which is the actual reason it outperforms either alternative.
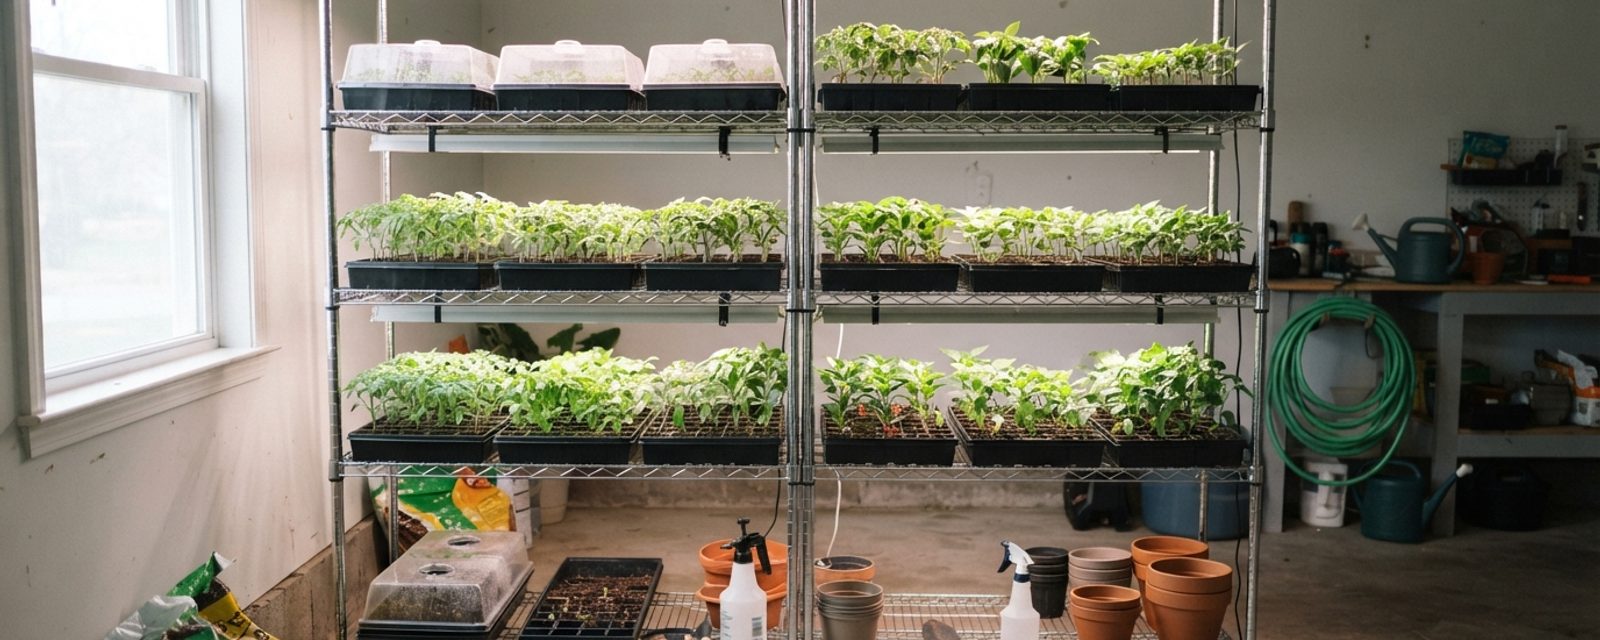
That matters more here than it does further south. Scotland's growing season is already shorter than the rest of the UK's, and the gap shows up specifically at the start of it: the full regional breakdown of last-frost timing and safe planting-out dates is laid out in the frost dates by region guide, but the short version is that many parts of Scotland can't safely plant tender crops outside until weeks after equivalent English regions. A station that gets seedlings to transplant-ready size indoors, on a controlled schedule, converts that lost outdoor time into usable growing time instead, and pairs well with choosing quicker-maturing varieties where a crop offers them, for the same reason, both push more of a short Scottish season into productive growing rather than waiting. This is a five-part build, shelving, lights, timer, heat mat, humidity domes, assembled as one system, with a realistic look at what it costs and what it doesn't.
The shelving: a plain wire rack as the frame
The base of the station doesn't need to be purpose-built for gardening at all. A basic wire shelving unit, the kind sold for kitchen, garage or utility storage in any hardware or homeware shop, does the job: open wire shelves let air and light move freely, the uprights give you a fixed, repeatable distance to hang lights from, and most units are adjustable in height so shelf spacing can change as seedlings grow. A four- or five-tier unit gives enough vertical space to run two or three growing shelves with light fixtures clipped or zip-tied underneath each one, plus a shelf left spare for trays waiting their turn or for hardening-off staging. A standard-width unit comfortably holds two or three full-size seed trays side by side per shelf, so a three-growing-shelf rack realistically runs six to nine trays at once, plan sowing dates and tray count against that before buying more seed than the rack can actually hold at any one time.
Two practical notes worth building in from the start rather than retrofitting later:
- Put a waterproof tray liner or a cheap plastic sheet under each growing shelf. Wire shelves let water through, and a rack over a carpeted spare room or a wooden floor is worth protecting once, not after the first spill.
- Site it away from a cold exterior wall or an unheated space if possible. The station regulates light and heat mat warmth, but ambient room temperature still matters for anything that isn't sitting directly on the mat.
- Leave a small gap for air to move, or point a small desk fan at the shelves on a low setting for part of the day. Still, damp air sitting under a humidity dome is exactly the condition damping-offA fungal disease that kills seedlings at soil level, usually caused by overwatering, poor airflow, or reused unsterilised compost or trays. Full definition → (a fungal disease that rots seedlings at the base, often before they've even properly emerged) spreads fastest in, and gentle airflow also toughens seedling stems before they ever reach the hardening-off stage.
Grow lights: cheap LED strips, not spectrum shopping
The light itself is where the biggest cost trap sits. A basic full-spectrum LED strip light, the kind sold for aquariums, shop use, or as a dedicated grow-light strip, is genuinely adequate mounted an inch or two above a shelf of trays; the spectrum and intensity numbers, and the full running-cost math, are worked through in the LED grow lights guide. There's no need for an expensive branded panel unless the rack is carrying several shelves' worth of trays at once, in which case a proper panel earns its keep through more even coverage across the whole shelf rather than through spectrum quality.
The build point for a station specifically: mount lights on chains, cable clips or cup hooks screwed into the wire shelf above, not taped or balanced in place, so the height can be raised as seedlings grow without dismantling anything. Seedlings that stay too close to a fixed-height light for too long stretch and go leggyDescribes a plant that's grown tall, thin and sparse rather than bushy, usually from too little light or not being pinched out. Full definition → just as reliably as seedlings that don't get enough light at all.
The timer: consistency over intensity
Most vegetable and flower seedlings do best on around 14–16 hours of light a day, which is the "long-day" range the RHS recommends for germination and early growth. That figure carries more weight in Scotland specifically than the UK-wide number suggests: at the point in late winter and early spring when a station is doing the most work, Scotland's natural daylength runs noticeably shorter than southern England's at the same calendar date, so a windowsill alone falls further short of 14–16 hours here, at exactly the point in the calendar an early Scottish sowing needs it most.
What breaks the schedule in practice isn't usually the hours themselves, it's forgetting. A basic mechanical or digital plug-in timer, sitting between the wall socket and the light strip, removes the daily habit entirely and keeps every shelf on the same schedule regardless of who's around to switch things on and off. This is also the point in the build to think about load: a heat mat, a light strip (or several) and a timer are commonly all drawing from one extension lead or socket run. In practice this station's combined draw is low, a small heat mat and a couple of LED strips together typically pull well under 100 watts, against a standard UK 13-amp socket or fused extension lead rated for around 3,000 watts, so the real risk isn't overloading a single lead, it's an unfused, unswitched multi-plug adaptor with a poor connection sitting under a damp shelf. Use a proper fused, switched extension lead rather than a bare adaptor, plug it into a socket protected by an RCD (residual current device) if the circuit has one, and check the plug and socket aren't getting warm after the station's been running a while, standard precautions for any electrics sitting near trays of water, not specific to this build.
Heat mats: what they actually add, and to what
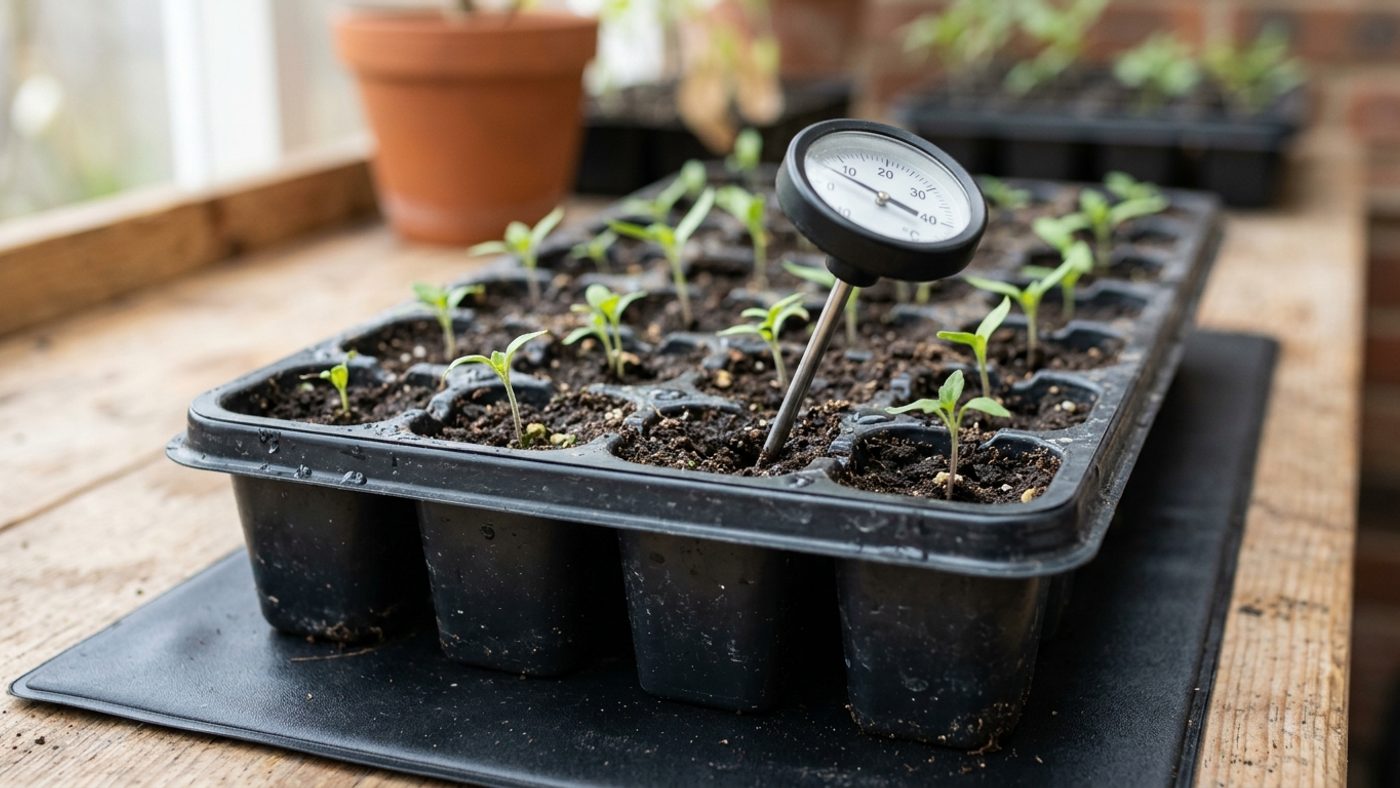
A heat mat sits under the seed tray and warms the compost from below by a few degrees above room temperature, typically into a range of roughly 18–21°C at the compost, which lines up with the RHS's general guidance that most seeds need around 18°C to germinate reliably, against a baseline finding that most seeds simply won't germinate at all below a soil temperature of about 7°C. The mechanism is specific to the compost, not the room: a heat mat only has to warm a thin layer of compost, not the air around it, so it reaches a target germination temperature on a fraction of the energy heating the whole room to the same point would take.
A heat mat is not a blanket requirement for every seed on the rack, though. Plenty of standard vegetable and herb seeds germinate perfectly well at ordinary indoor room temperature with no supplemental heat at all, and a mat mainly earns its cost for crops that specifically want warmer-than-room conditions to germinate well, or for a station standing in an unheated utility room, porch or garage where ambient temperature runs noticeably below normal indoor levels. That second case carries more weight in Scotland than it would somewhere milder: a cold spare room, porch or garage here sits closer to outdoor overnight temperatures for longer into spring than the equivalent space further south, so ambient air alone is less likely to clear even the RHS's general 7°C germination floor without help, let alone the higher-teens range chillies and tomatoes actually want.
An unthermostated mat, the budget option, has one real drawback worth planning for: without a thermostat cutting it off, it can run warmer than the compost needs and dry out the surface faster than a tray at room temperature would, so check and water it slightly more often than an unheated tray rather than assuming it needs the same attention.
| Crop | Typical germination temperature | Needs a mat in a normal heated room? |
|---|---|---|
| Chilli pepper | Around 21°C | Usually, yes, sits above typical indoor room temperature |
| Tomato | Around 18°C | Often benefits, especially for an early, cold-room sowing |
| Aubergine | Similar range to chilli, on the warmer side | Usually, yes |
| Pea, broad bean | Around 10°C minimum | Not normally, most heated rooms already clear this |
| Beetroot | Around 7°C minimum | No |
| Lettuce, most salad leaves | Cool-tolerant, germinates well below 18°C | No, and can actually germinate poorly if too warm |
A full crop-by-crop reference, including the distinction between soil and air temperature and how Scottish outdoor timing shifts these dates, is in the seed germination temperature guide. For the station itself, the practical rule is: run the mat under the tray of chillies, tomatoes and aubergines that's sown early in a cold room, and leave everything cold-tolerant sitting on an unheated shelf, running every tray on a heated mat regardless of what's in it is the single easiest way to overspend on this build for no germination benefit.
Humidity domes: keeping the surface from drying out before it germinates
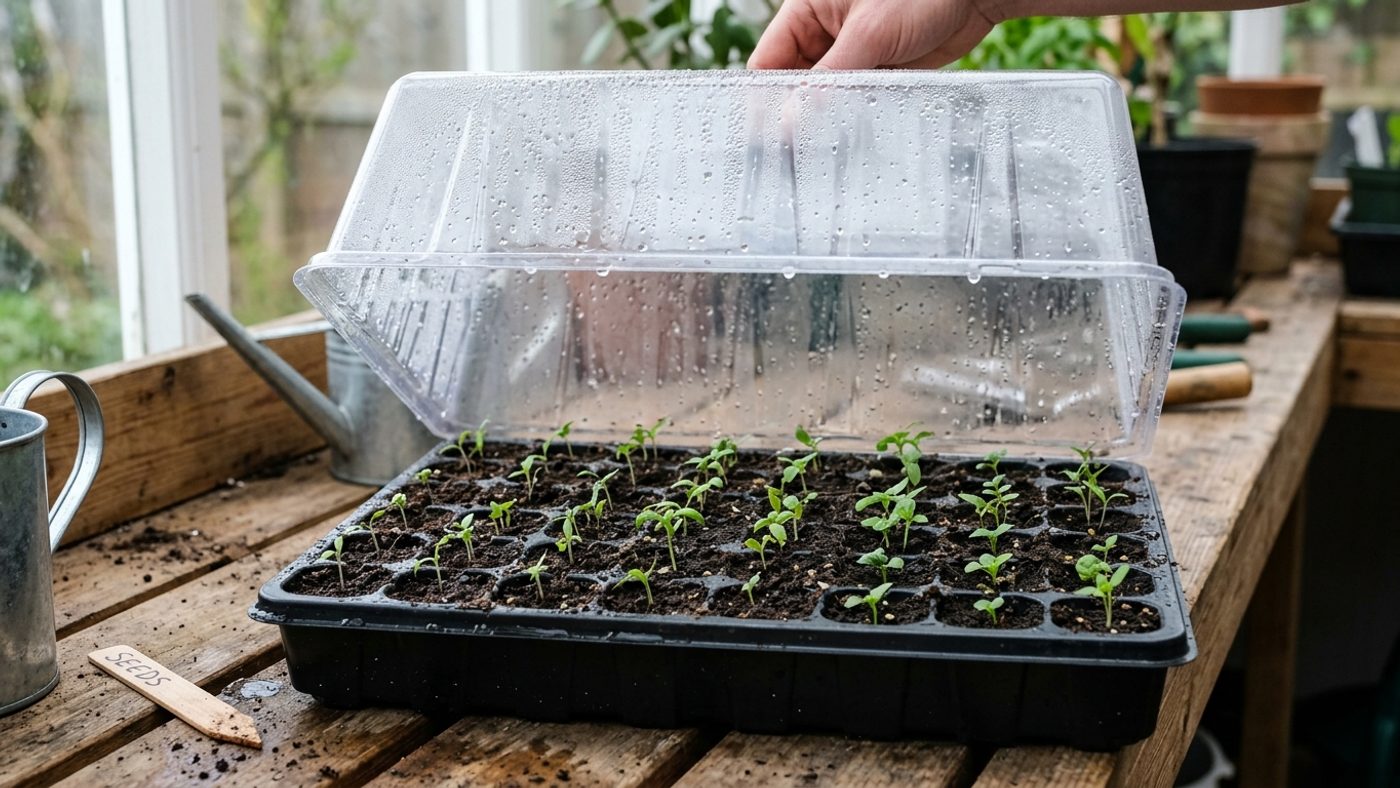
A clear plastic lid, sometimes sold with the tray as a "propagator" set and sometimes bought separately to fit an existing tray, traps moisture rising off the damp compost and keeps the surface humid while seeds are germinating. The RHS's own guidance for sowing indoors is to place "a piece of glass, propagator lid or clear plastic fruit tray" over the tray specifically to retain moisture and speed germination, a cheap clear plastic fruit or bakery tray from the kitchen does the identical job to a purpose-bought dome if a station is being built as cheaply as possible.
The timing matters as much as the dome itself: the lid comes off the moment seedlings emerge, not a few days later. Left on too long after germination, the same trapped humidity that helped the seed sprout starts encouraging damping-off and other fungal problems in the young seedlings, so this is one part of the build that needs a daily glance rather than a set-and-forget schedule.
Watering matters just as much once the dome is off. Pouring from above disturbs fine compost and small seedlings and can compact the surface; standing trays in a shallow water-filled tray instead lets the compost draw up moisture from below through the tray's drainage holes. Capillary matting, a thin, absorbent fabric sold by the metre in garden centres, laid under the trays and kept damp, does the same job across a whole shelf at once rather than tray by tray, and is worth setting up on the growing shelves from the start rather than adding later.
Growing medium
Ordinary multipurpose compost can work, but it's coarser and less consistent than the medium seeds actually want: seed and cutting compost is finer, lower in nutrients (seedlings don't need much feed until they've got true leaves), and holds moisture more evenly, all of which reduces the risk of rot and uneven germination that the heat and humidity sections above are already working to avoid. A peat-freeCompost made without peat, which is harvested from a slow-forming, carbon-storing wetland habitat that peat extraction damages. Full definition → seed compost does the same job as a peat-based one for this stage.
Why it works out cheaper
Every part of this build is an everyday household or hardware-shop item, a basic wire rack, an LED strip, a plug-in timer, an unthermostated heat mat and a set of trays are each single-to-low-double-digit-pounds purchases individually, not specialist kit, bought once and reusable for years, against the repeated cost of buying trays of plug plants or bedding trays from a garden centre every few weeks across a season. Here's how the cost breaks down by component:
| Component | What drives the cost | Reusable across seasons? |
|---|---|---|
| Wire shelving unit | Size (tier count, shelf depth), the cheapest single line item in the build | Yes, indefinitely |
| LED strip lights | Length and whether it's a basic aquarium/shop strip or a proper grow panel | Yes |
| Plug-in timer | Mechanical vs digital, mechanical timers are the cheaper option and perfectly adequate for a fixed daily on/off schedule | Yes |
| Heat mat | Size and whether it includes a thermostat, a basic unthermostated mat is the budget option | Yes |
| Trays and humidity domes/lids | Buying a matched tray-and-lid set costs more than reusing food-grade trays with a clear plastic cover | Trays yes, domes usually yes |
The lights are the one component with genuinely verifiable running-cost figures, worked through against the UK electricity price cap, in the LED grow lights guide, that number is small enough (a few pounds across a whole sowing season for a windowsill-scale strip) that it isn't the deciding factor in whether this build is worth it. A heat mat draws more current than an LED strip and typically runs for longer stretches, so its running cost adds more than the lights' does, though not enough to change the overall comparison against buying plug plants repeatedly.
Building the station, step by step
- Assemble the shelving unit somewhere level, away from a cold exterior wall if the room allows, with enough headroom under each growing shelf (roughly 30–40cm) to fit a seed tray, the light fixture above it, and the first few weeks of upward growth before the light needs raising again.
- Line the growing shelves with a waterproof tray or sheet before anything else goes on them.
- Mount a light strip under each growing shelf, using cable clips, chain or cup hooks so the height is adjustable, starting close to where an empty tray would sit.
- Wire the timer in between the wall socket (or a fused, switched extension lead) and the lights, and set it for around 14–16 hours on.
- Place the heat mat on the shelf reserved for heat-loving crops only, not under the whole rack, and check it reaches a warm-but-not-hot compost temperature before trusting seeds to it.
- Sow into seed compost, water from below, and fit the humidity dome or clear cover over each tray.
- Check daily: bottom-water as the compost surface starts to dry, and remove each tray's cover the moment its seedlings break the surface.
- Raise the light as seedlings grow, keeping it close enough to prevent stretching, and move trays off the heat mat once germinated unless the crop specifically benefits from continued bottom warmth.
- Prick outMoving individual seedlings from the crowded tray they germinated in into their own space, once they have their first true leaves. Full definition → and pot onMoving a plant into a larger pot as its roots fill the current one, giving it more room and fresh compost before it becomes pot-bound. Full definition → into individual small pots once seedlings have their first true leaves and are large enough to handle, rather than leaving them to crowd each other in the original tray.
- Once seedlings are ready to go outside, move them through a proper hardening-off period rather than straight from the station to the garden, the process and timing are covered in the hardening off seedlings guide, and outdoor planting-out timing for the local area is in the frost dates by region guide.
If seedlings still come up leggy despite the timer and raised lights, the light is usually sitting too far above the tray, bring it back down closer, within an inch or two, rather than assuming the daily hours need increasing further. If damping-off shows up despite the airflow and cover-removal timing above, it's worth checking the compost isn't being kept too wet between waterings and that the fan or air gap is actually reaching that shelf.
Common questions
Do I need a heat mat for every tray on the station?
No. Most temperate vegetable and herb seeds germinate reliably at ordinary indoor room temperature with no supplemental heat. A mat is worth the cost specifically for heat-loving crops like chilli, tomato and aubergine, or for any tray in a station standing in an unheated utility room, porch or garage.
How long should the lights stay on each day?
Around 14–16 hours is the general range for vegetable and flower seedlings, run on a timer so it stays consistent rather than depending on someone remembering to switch it on and off.
When do I take the humidity dome off?
As soon as seedlings emerge, not a few days after. Leaving the cover on past germination traps humidity against young seedlings and raises the risk of damping-off and other fungal problems.
Is it safe to run a heat mat, several lights and a timer off one socket?
Individually, none of these draws much power, but running several off one unrated multi-plug adaptor is worth avoiding, use a fused, switched extension lead rated for the combined load instead.
Will this actually work out cheaper than buying bedding plants and plug plants?
Comparatively, yes, across a full sowing season: the rack, lights and timer are reusable for years, and the mat and trays last multiple seasons, against the repeated cost of buying trays of plug plants every few weeks.
Why does a timer matter more for a Scottish station than it would further south?
Because natural daylength in late winter and early spring, when this build is doing the most work, runs shorter in Scotland than in southern England at the same calendar date. A windowsill can't make up that difference on its own; a timer running the lights for a fixed 14–16 hours is what actually gets seedlings the daylength they need this early in the year.
Sources
5 sources, recorded with what each was used for
- RHS: How to Sow Seeds Indoors: Propagator lid/humidity guidance, the ~18°C general germination temperature, and when to remove covers after emergence
- RHS: Propagation techniques: The definition of a propagator and bottom-heat guidance for cuttings and seeds
- RHS: Getting started with vegetables — seed sowing techniques: The ~7°C minimum soil germination baseline and the recommendation to sow tender vegetables indoors with heat, preferably in a thermostatically controlled propagator
- RHS: How to grow Tomatoes: Tomato germination temperature
- RHS: How to grow chilli peppers: Chilli germination temperature