
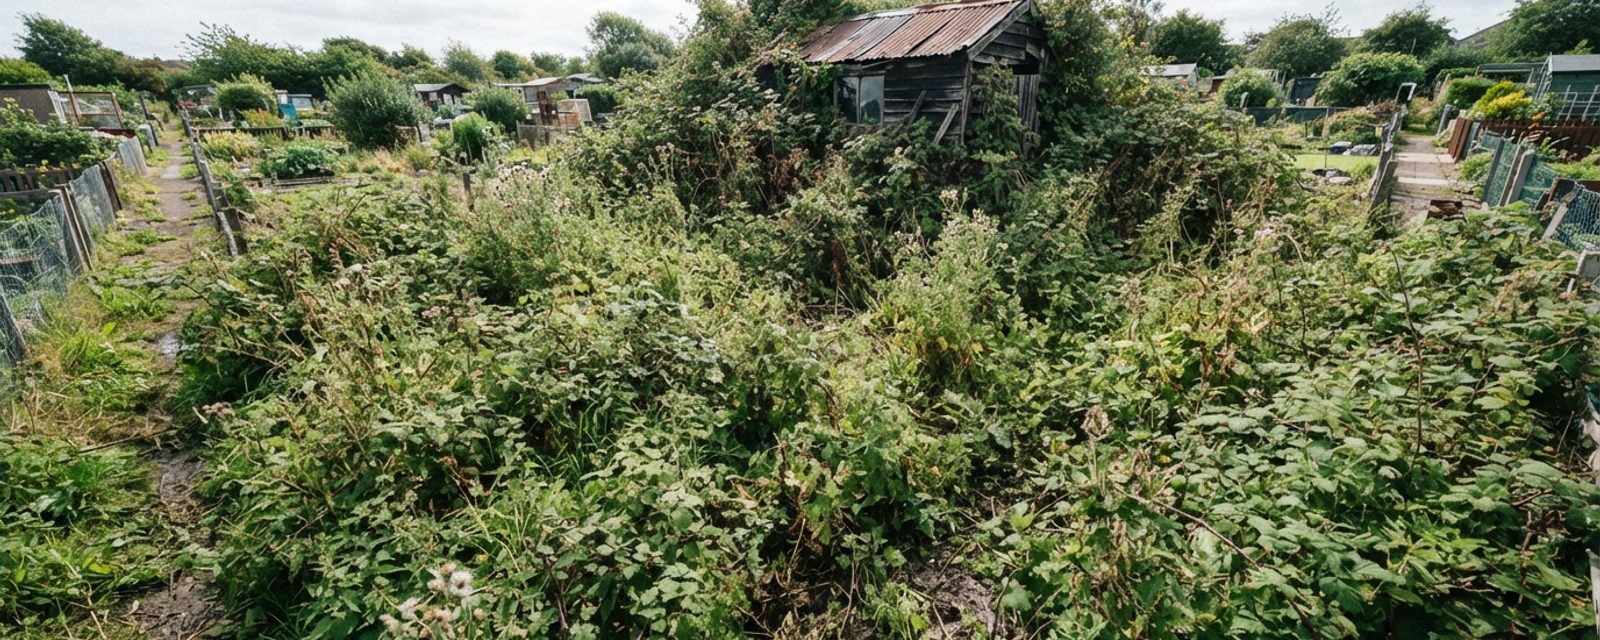
You collect the keys, walk down the path with the site secretary, and stop at a gate that hasn't been opened in a long time. What's on the other side isn't a blank rectangle of soil, it's waist-high brambles arching over the path, nettles standing shoulder height, a couple of self-seeded saplings pushing up through the middle, and, somewhere under all of it, whatever the last tenant left behind. If you've just come from getting your name off an allotment waiting list, this is the moment the plot stops being a line on a spreadsheet and becomes a physical problem you have to solve with a fork and a strimmer.
It's also the moment most people make their first mistake: trying to clear the whole thing in one exhausting weekend, or reaching for a rotavator to "get it all done fast." Neither works. What actually works is a realistic order of operations: working out from access points rather than attacking the worst-looking corner, understanding what it actually takes to kill a perennial weed's roots rather than just its top growth, knowing why a rotavator can turn a contained weed problem into one spread across the whole plot, and pacing the job across a realistic timeline rather than one exhausting push.
If you haven't already, what to do with your first allotment covers the wider picture of settling into a new plot, including the principle of clearing roughly half in year one rather than all of it. This piece stays focused on the clearance itself: the order to work in, what bramble, ground elder, couch grass, horsetail and nettle roots actually need to die rather than just disappear for a season, and what a genuinely staged multi-month timeline looks like.
First, walk the plot before you touch anything
Before any cutting starts, walk the whole plot and make a rough mental, or written, map of what you're dealing with.
Access and boundaries. Where are the paths, and what's blocking them? A bramble arch across the only way in is a different priority to bramble at the far end you won't reach for months.
Hazards. Unstable sheds, buried glass, rusted metal, old carpet or ground-cover sheeting gone to shreds, tree stumps with hidden roots. Anything genuinely dangerous, or that could injure you or a family member, gets dealt with first, regardless of where it sits in the "ideal" clearance order. If you're working around old rusted metal or debris, make sure your tetanus vaccination is up to date before you start.
Two plants worth checking for specifically before you cut anything. Giant hogweed's sap contains chemicals that make skin extremely sensitive to sunlight, and contact can cause burning, blistering and long-lasting scarring hours after exposure, a plant with thick, bristly, purple-blotched stems over a metre or two tall and large white flower umbels is worth treating with real caution, not strimming through. If you do need to work near it, keep skin covered, wear gloves and eye protection, and avoid doing it in bright sun, since it's sunlight that triggers the reaction on any sap that gets on skin. Japanese knotweed (reddish-purple bamboo-like stems, spade-shaped leaves in a zig-zag pattern) is legally controlled: it's an offence to cause it to spread, and any cut or dug material counts as controlled waste that must go to a registered waste carrier and authorised disposal site, never a home compost heap or council green bin, a register of licensed waste carriers covering Scotland is available online. If you suspect either on the plot, stop and get a positive ID before doing anything else there.
What's actually growing. Brambles and nettles are usually obvious. Look underneath them for ground elder's fresh green leaves, couch grass's pale creeping stems, and any self-seeded tree saplings coming up in the mix. Self-seeded sycamore is a realistic find on a neglected plot, it seeds itself prolifically and colonises bare or disturbed ground quickly, so a handful of thin, straight- stemmed saplings with opposite buds are worth checking against a tree-ID guide before deciding whether they're worth keeping.
Structures worth keeping. An old but sound shed, established fruit bushes, a compost bay, mark these so you don't accidentally strim or dig them out in the rush to clear.
Work outward from paths and access, not wherever looks worst
The instinct is to attack the worst-looking corner first. Resist it. A more efficient, and much less demoralising, order is:
- Clear access first. Cut back whatever blocks the path in and any route you'll need a wheelbarrow through. You can't work a plot you can't get onto.
- Cut back, don't dig, on your first pass. Use loppers, a brush cutter or a strimmer to knock everything down to a manageable height across the whole plot before you start digging anywhere. This lets you actually see what's underneath, buried debris, stumps, the shape of the ground, and stops you spending a whole weekend on one bramble thicket while the rest of the plot is still impenetrable. If dense bramble or scrub is thick enough that birds could be nesting in it, bear in mind it's an offence to destroy an active nest, cutting between March and August is when that risk is highest, so check for nests first if you're clearing dense growth in that window.
- Section the plot and commit to the smallest patch you can actually plant this season. Rather than "half the plot" as an abstract target, pick a specific, bounded area, ideally the least overgrown, closest to a water source, and free of major hazards, and treat everything else as "under control" rather than "cleared." Cut, cover, or mow the rest so it doesn't get worse while you focus on the priority section.
- Deal with anything actively spreading toward your cleared section last, once you know where your boundary is. There's no point beating back bramble at the far fence if you haven't yet decided where your growing area actually ends.
This section-by-section approach matters more the more overgrown the plot is: it turns an impossible-looking job into a series of smaller ones with a visible finish line.
Killing perennial weed roots, not just the top growth
This is the part that most clearance advice skips past with a single line about "removing the roots." Cutting bramble, ground elder, couch grass, nettles or horsetail back to ground level does not kill them, cut stems die, but you'll see fresh growth from the same root system within weeks. Each behaves differently underground, and the method has to match.
Bramble
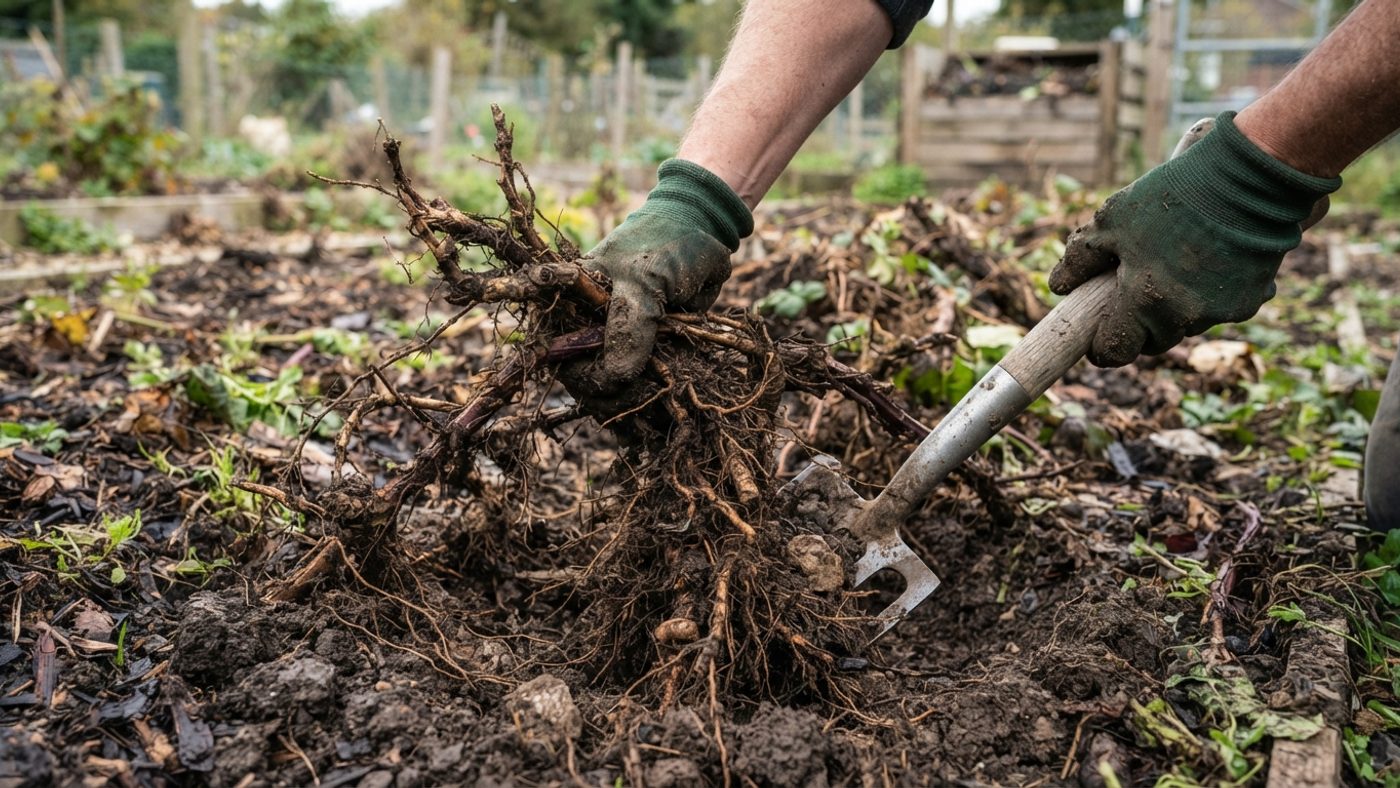
Cut stems back to around 30cm from the ground using loppers, a hedge trimmer or a brushcutter, wear thick gloves throughout, thorns are the most common source of injury on this particular job. Once you can see the base, dig out the main stump and as many roots as you can with a spade and a border fork (a narrower-tined fork built for working close around roots and in tight spaces, rather than a standard digging fork). Brambles regrow from root and stump fragments left in the ground, so any pieces you miss will resprout, check back over the growing season and dig out new shoots as they appear rather than assuming one pass has finished the job. Don't put dug-out bramble roots on a home compost heap; the fragments can survive and regrow in the heap itself.
Ground elder
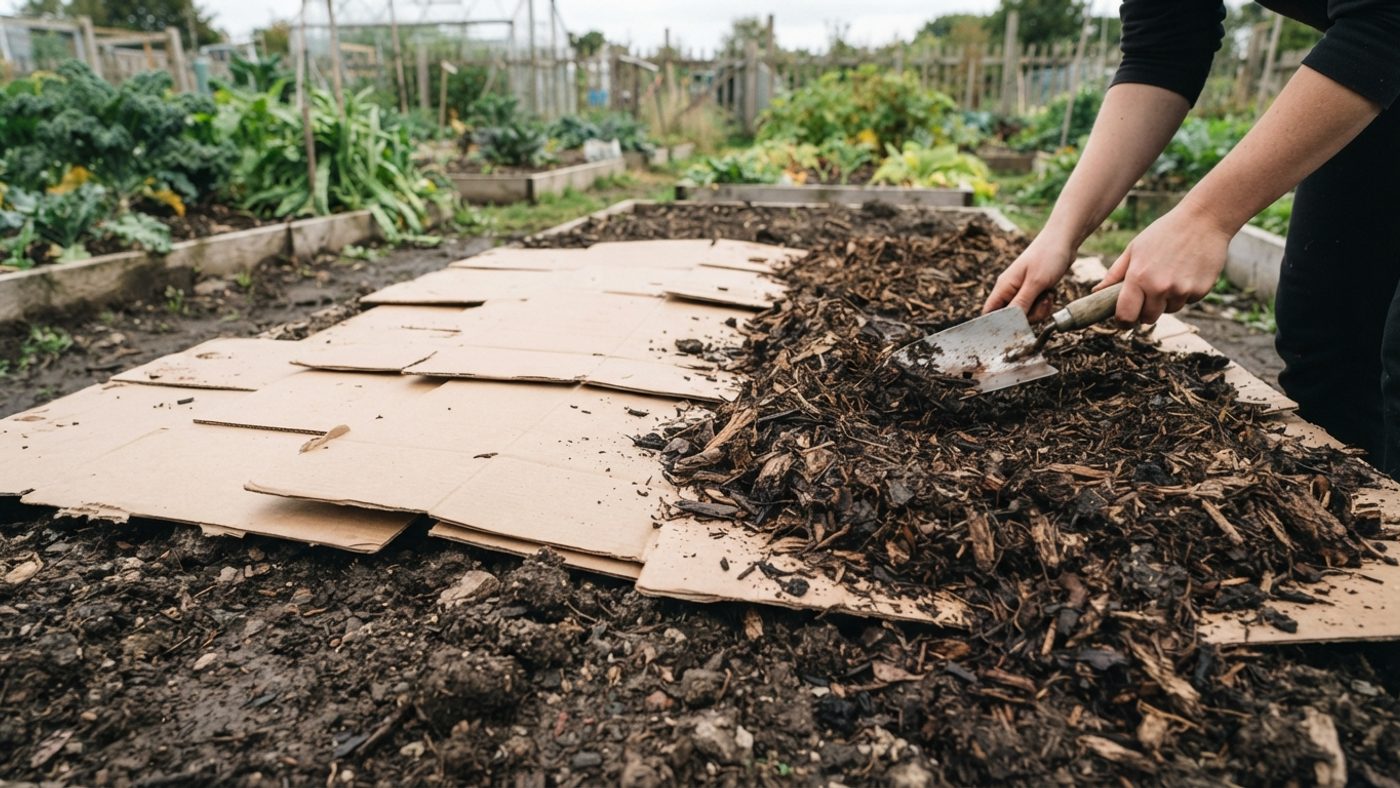
Ground elder spreads by rhizomes, underground stems that can regenerate a whole new plant from a small broken section. That makes it one of the worst candidates for hasty digging: hoeing, forking carelessly, or rotavating chops the rhizome network into dozens of viable fragments instead of removing it. The better approach is patient forking, a border fork pushed to its full depth, lifting and sifting the soil to remove as much of the root system as possible in one go, rather than repeated shallow passes. Where ground elder is dense and you're not planting that section this year, smothering works: cover with cardboard, then around 20cm of organic mulchA layer of material spread over the soil around plants to suppress weeds, retain moisture, and improve soil structure as it breaks down. Full definition → or a heavy-grade biodegradable membrane, and leave it in place for a few years, topping up the mulch as it breaks down.
Couch grass
Couch grass spreads through a dense mat of pale rhizomes just under the surface, and, like ground elder, small fragments regenerate into new plants, so it's counterproductive to chop it up by hoeing or forking carelessly. In borders or beds, tease it out by hand with a fork, ideally in early spring before it's put on a season's growth, checking the soil for stray fragments as you go. Where you're not planting immediately, the same smothering approach applies: cut back top growth, cover with cardboard and roughly 20cm of mulch or matting, and leave it for at least a few growing seasons rather than a few months.
Nettles
Common nettle's roots are shallower than bramble, ground elder, couch grass or horsetail, mostly in the top 20cm of soil, which makes forking out established clumps genuinely practical rather than a several-year project. Lift and remove as much of the root system as possible with a border fork, working through the whole patch rather than the easy bits. Any piece of root or creeping stem left behind can regrow, so avoid digging or rotavating nettle-covered ground carelessly, since that chops the roots up and spreads them the same way it does with the others. Regular cutting alone, without digging, eventually kills nettles too, but expect that to take more than one growing season. Don't put nettle roots or creeping stems on a home compost heap.
Horsetail
If you find it, treat horsetail (also called mare's tail) as the hardest case on this list: its rhizomes can run up to 2m deep, which puts most of the root system well out of reach of a fork. Removing new shoots as soon as they appear, repeatedly over several years, weakens it, and forking out what rhizome you can reach adds to that over time, but full eradication by digging alone is realistically a multi-year project on an established patch. Glyphosate isn't the shortcut it might seem either: horsetail's waxy, moisture-resistant foliage sheds most of what lands on it, so even repeated chemical treatment over several years is often only partially effective. Smothering with cardboard and around 20cm of mulch or heavy-grade matting works the same way as for ground elder and couch grass, but expect to leave it in place for several years rather than one season if horsetail is what you're dealing with.
The common thread, and when to consider glyphosate
Annual weeds die back under a few months of cover; perennial weeds like these typically need covering for several growing seasons, not one (horsetail longer still). Where digging is your method rather than smothering, the target is always the same: get the whole root system out in as few, largest pieces as possible, rather than hacking at it repeatedly. Glyphosate is a legitimate option on ground you're not planting soon and where digging or smothering alone aren't keeping pace, sprayed on the leaves, it's drawn down into the root system as the plant feeds itself, which is why it's most effective applied between June and September while weeds are actively growing rather than dying back for winter. Always check the product is approved for garden/amateur use and follow the label. It isn't a quick fix on established bramble, ground elder or couch grass: their extensive root systems typically need more than one application over a season, and it needs calm weather so it doesn't drift onto anything you want to keep, and dry weather so rain doesn't wash it off the leaves before the plant has absorbed it.
The rotavation mistake
A rotavator looks like the obvious tool for turning a jungle into bare soil fast, and on ground that's genuinely just grassy or free of perennial weed roots, it can be. On ground with bramble, ground elder, couch grass, nettle or horsetail roots in it, it's close to the worst thing you can do.
The mechanism is straightforward: a rotavator's tines don't remove roots, they chop through them. Each of these plants can regenerate a complete new plant from a small fragment of root or rhizome, that's literally how they spread naturally underground. A rotavator takes one bramble root system or one couch grass rhizome mat and turns it into dozens, sometimes hundreds, of separate viable fragments, then mixes them evenly through the topsoil where every one of them can sprout independently. What was a weed problem in defined patches becomes a weed problem across the entire cultivated area.
The right order is roots out first, by hand, by smothering, or by glyphosate, and mechanical cultivation only afterward, once you're confident the perennial roots are gone or substantially weakened. If time is genuinely short and the ground is clear of these root systems, a rotavator can save real effort, just avoid using one on wet soil, which compacts and smears rather than breaking up cleanly.
Choosing tools for the scale of the problem
| Plot condition | Suggested tools | Notes |
|---|---|---|
| Lightly overgrown (grass, light annual weeds, a season’s neglect) | Fork, spade, hand trowel, secateurs | Hand tools are enough to dig out roots as you go; no need to cut back first |
| Moderately overgrown (bramble patches, established perennial weeds, chest-high growth in places) | Loppers or a hedge trimmer for brambles, strimmer/brushcutter for long grass and nettles, then fork and spade for roots | Cut back before you dig, you need to see the ground before you can work it |
| Severely overgrown (waist-high growth throughout, tree saplings, brambles blocking access, buried debris) | Brushcutter (petrol, for sustained heavy cutting), loppers, a mattock or pickaxe for stubborn roots and buried obstructions | Consider hiring a contractor or a professional brushcutting/clearance service for the initial cut-back |
| Very severe (mature saplings, structural debris, ground unsafe to walk in places) | Professional help, a tree surgeon for saplings above sapling stage, a contractor with a digger for stumps and buried debris | This is a genuine hire-in situation, not a DIY-only problem |
Any strimmer or brushcutter work calls for its own protective gear on top of the gloves already covered above: eye protection against flung debris, ear defenders once you're running a petrol machine for any length of time, and sturdy footwear rather than ordinary trainers, standing in cut vegetation and old debris. A mattock or pickaxe on stubborn roots is a two-handed, close-quarters tool, keep your footing solid and other people well clear of the swing.
Don't feel obliged to do everything by hand out of principle. A single afternoon of hired brushcutting on a genuinely severe plot removes the physical barrier to even assessing what you're dealing with, and it's often the difference between a plot that gets abandoned in month two and one that gets worked steadily from month one. Rates vary a lot by contractor and region, so get a couple of local quotes before deciding, but it's worth weighing against what your own time is worth and what a hired tool or petrol brushcutter costs to buy outright for a job you'll likely only do once.
What to do with the cleared material
Bramble and other woody cuttings can go on a compost heap if shredded or chipped first, cut up woody material composts faster and more evenly than whole branches, and typically takes several months to over a year to break down fully. Don't add dug-out roots of bramble, ground elder or couch grass to a home heap; a domestic compost pile rarely gets hot enough for long enough to guarantee killing viable root fragments, and you risk reintroducing the same weed wherever you spread the finished compost.
If you're considering burning woody debris on site, whether that's realistic on your plot depends on the site's own rules and Scotland's wider nuisance and smoke regulations, see the full rundown on allotment bonfire rules before you light anything. Anything confirmed as Japanese knotweed is a separate case entirely: it counts as controlled waste and needs a registered waste carrier and authorised disposal site, not a bonfire or a compost heap.
A realistic timeline
Treat a genuinely overgrown plot as a multi-month project, staged around what you can actually plant when, not a single push to "finish." The stages below overlap deliberately rather than running one after another: while you're clearing and prepping your priority section in the first few weeks, the rest of the plot is already sitting under cardboard and mulch in the background, doing nothing except quietly suppressing regrowth. At any given point you're usually active in one section while the others are covered and left alone, not working through every row of the table at once.
| Stage | Roughly when | What happens |
|---|---|---|
| Walk-round and access clearance | Week 1 | Map hazards, structures worth keeping, and weed types; cut back and clear the entry path |
| Whole-plot cut-back | Weeks 1–3 | Strim/brushcutter/loppers across the full plot to knock growth down and reveal the ground, without digging yet |
| Priority section: root removal | Weeks 2–6 | Fork and spade out perennial roots in the section you intend to plant this season |
| Priority section: soil preparation | Weeks 4–8 | Once roots are out, add organic matter and prepare beds; a rotavator is safe to use here if the section is genuinely root-free |
| First planting | From roughly week 6–8 onward, weed and season dependent | Plant into the prepared section while the rest of the plot is still under cover |
| Remaining sections: smothering | Ongoing from week 1 | Cardboard and mulch laid over everything not yet being worked, left in place for a full growing season or more where perennial weeds are present |
| Full plot under active management | Typically 12–18 months for a severely overgrown plot | Perennial weed regrowth checked and removed through at least one full growing season on each section before considering it “clear” |
Two things worth building into that timeline specifically because of where you're gardening. First, the "week 6-8" planting figure above is a starting point, not a fixed date, last-frost timing varies considerably within Scotland itself, so check the regional frost dates guide for a station near your site before treating any of the table above as gospel for your specific plot. Second, damp, sheltered conditions under freshly cut vegetation and mulch suit slug activity and give the perennial weeds above another chance to regrow from any root fragment you missed, protect new plantings in a just-cleared section with clochesA small, portable clear cover placed over an individual plant or short row to trap warmth and keep off wind, rain and pests. Full definition →, collars or a torchlight check on damp evenings, more detail in the first allotment guide, and expect to go back over each cleared section at least once during the growing season to catch regrowth rather than assuming one clearance pass has finished the job.
And if the scale of what you've taken on tempts you to clear faster than the ground allows, that's exactly the kind of overcommitment covered in first-year allotment mistakes, it's worth a read before you decide how much to tackle in year one.
Common questions
How long does it take to clear an overgrown allotment plot?
For a severely overgrown plot, waist-high growth, established perennial weeds, saplings, expect the full plot to take somewhere in the region of 12 to 18 months of staged work to bring fully under control, though you can usually have a planting-ready section within 6 to 8 weeks by focusing effort on one area first rather than the whole plot at once.
Can I use a rotavator to clear an overgrown allotment?
Only once you’re confident the ground is free of bramble, ground elder, couch grass, nettle or horsetail roots. Rotavating soil that still contains these roots chops them into many small fragments, and each fragment can regrow into a new plant, multiplying the weed problem rather than solving it. Remove perennial weed roots by hand, smothering or glyphosate first, and rotavate afterward if you still want to.
Do I need to dig out every scrap of bramble or ground elder root?
As close to it as possible in one pass, because both regenerate from root fragments left behind. In practice you won’t get every fragment first time, check the area over the following growing season and dig out any regrowth as it appears, rather than treating one clearance session as final.
Is it worth hiring a contractor to clear a bad plot?
For a genuinely severe plot, waist-high growth throughout, tree saplings, buried debris, ground you can’t safely walk on, yes, it’s often worth it. A day of professional brushcutting or a contractor with a digger for stumps and debris can remove the physical barrier to starting in hours rather than weeks, leaving your own time for the root-removal work machinery can’t do safely.
What tools do I actually need before I start on a badly overgrown plot?
For anything past light neglect, loppers or a hedge trimmer for brambles, a strimmer or brushcutter for long grass and nettles, and a fork and spade for root removal cover most of the work. Wear eye protection, sturdy footwear and ear defenders with any strimmer or brushcutter, and gloves throughout, this is as much a safety-equipment job as a tools one. Hiring a brushcutter or a day of contractor time for the initial cut-back is often worth it before buying anything for a job most people only do once.
Sources
15 sources, recorded with what each was used for
- RHS: Brambles: Cutting-back method, digging out stumps and roots, root-fragment regrowth, timing and safety
- RHS: Ground Elder: Rhizome regeneration from fragments, forking technique, smothering depth and duration, cautions against digging/rotavating, glyphosate limitations
- RHS: Couch Grass: Rhizome spread and fragment regeneration, hand-forking method, smothering depth and duration, caution against chopping roots by hoeing
- RHS: Non-chemical weed control: Smothering timeframes for annual vs. perennial weeds, mulch depth, hand tool types
- RHS: Soil Cultivation Tips: When a rotavator is appropriate, and caution against rotavating wet soil
- RHS: Weedkiller damage: recognise, fix and prevent: Glyphosate action, effective application window (June–September), sensitivity of some plants
- Garden Organic: No-dig gardening: Mulch depth (15–20cm) and materials, weed suppression timelines for annual vs. perennial weeds
- Soil Association: How to make your own compost: Composting timeframes, shredding woody material before composting
- Woodland Trust: Sycamore: Sycamore’s prolific self-seeding and colonisation, relevant to identifying self-seeded saplings on a neglected plot
- RHS: Japanese Knotweed: Identification, legal status under the Wildlife and Countryside Act 1981 and Environmental Protection Act 1990, disposal as controlled waste
- RHS: Giant Hogweed: Identification and the skin-burn hazard from its sap
- RHS: Hedges: Nuisance and Overgrown: Nesting-bird protection under the Wildlife and Countryside Act 1981 and the March–August cutting caution
- SEPA: Registered Waste Carriers and Brokers: Where to find a licensed waste carrier in Scotland for controlled waste such as Japanese knotweed
- RHS: Horsetail: Rhizome depth, why digging alone rarely eradicates it, glyphosate’s limited effectiveness against it, smothering method and duration
- RHS: Common Nettle (Nettles as weeds): Root depth, forking method, regrowth from rhizome fragments, caution against rotavating, cutting-alone timeline