
Look closely at your lawn a day or two after mowing. If the tips of the grass blades are ragged, frayed, or turning a pale grey-brown rather than staying clean green, the mower didn't cut them, it tore them. A sharp blade slices through a grass blade in one pass, leaving a clean edge that heals and greens over quickly. A dull one bruises and shreds the tip instead, and that damaged tissue is what you're seeing turn brown across the whole lawn. The torn tissue a blunt blade leaves behind is both unsightly and slower to recover, and more exposed to disease, than a clean cut would be.
If the cut looks torn rather than clean, check the blade before the engine, the deck height, or the grass itself; it's the most common cause and the easiest to rule in or out.
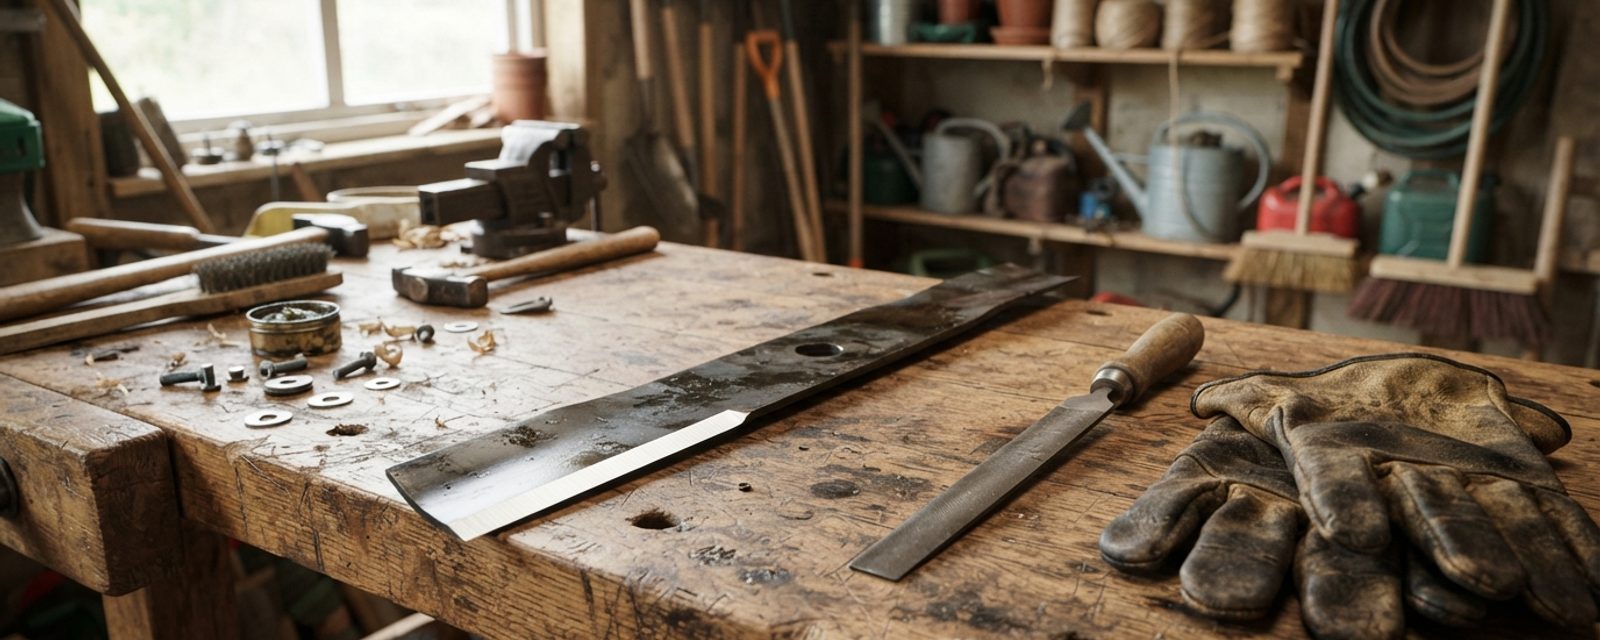
What you'll need: thick gloves, eye protection, hearing protection if you're using a grinder, a wood block to jam the blade, a socket or spanner for the centre bolt (ideally with a torque wrench), a vice if filing by hand, a mill file or a bench/angle grinder, and a nail or blade balancer for the balance check afterwards. Gather these before you start rather than partway through; you'll need most of them within the first few minutes.
Signs it's dulling, damaged, or out of balance
A ragged cut is the headline symptom, but three different problems can be behind what you find when you inspect the blade, and they need different fixes.
| What you see | Likely cause | What to do |
|---|---|---|
| Ragged, torn, or greyish-brown grass tips a day or two after mowing | The cutting edge has gone dull | Sharpen the blade |
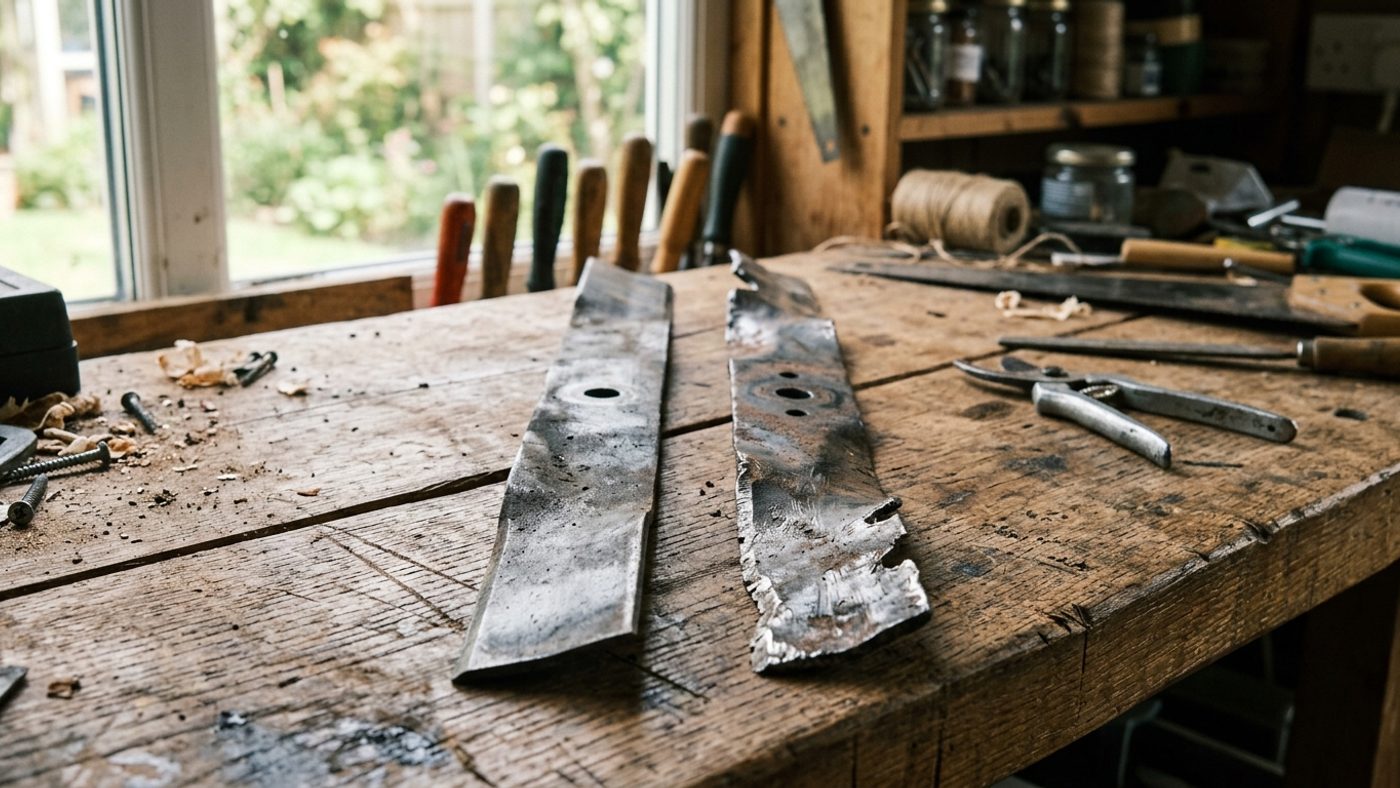
| Nicks, dents, cracks, or a blade visibly bent out of true | Physical damage from a stone, root, or other impact | Replace rather than sharpen |
| Vibration, unusual noise, or uneven wear appearing after a sharpen | The blade is out of balance | Rebalance before refitting |
A blade with signs of damage, cracks, or dents should be replaced rather than sharpened, and an unbalanced blade is not just a performance problem: left running, it will cause eventual damage to the mower or engine, so it's not something to leave and see how it goes.
Blade type also decides whether this is a home job at all. Most garden rotary mowers use a single spinning blade that a competent home gardener can remove and sharpen themselves; mulchingA layer of material spread over the soil around plants to suppress weeds, retain moisture, and improve soil structure as it breaks down. Full definition → blades (with extra curved cutting edges to chop clippings finer) and robotic-mower blades (small, cheap, replaceable rather than sharpened) both follow the same removal and safety principles, even though the blade shape differs. Cylinder mowers use a completely different cutting action, a rotating helical cylinder shearing against a fixed bottom blade rather than a single blade spinning flat, and sharpening theirs is best left to a professional rather than tackled at home.
Safety first: isolate the power before you go near the blade
Before the blade comes anywhere near a hand, a file, or a bench grinder, the mower needs to be made safe. This isn't a step to skip or rush:
- Petrol mowers: disconnect the spark plug lead. Grip it at the connector, twist it side to side, and pull it away from the plug, not the wire itself. If you're going further than a quick blade check, draining the fuel tank and closing the fuel tap is also worth doing before you tip the mower.
- Cordless/battery mowers: remove the battery from the mower entirely before touching the blade.
- Corded electric mowers: unplug from the mains and move the cable well clear of the working area.
Be absolutely certain the mower is switched off and unplugged, or the battery removed, before going anywhere near the blades. Once the power source is isolated, wear thick gloves and eye protection throughout; the edge is sharp enough to cut through a light glove, and both filing and grinding throw off metal fragments.
Removing the blade
With the mower isolated, tip it onto its side (following your mower's manual on which way it's safe to tip it, since some engines shouldn't be tipped with the air filter or carburettor facing down). Wedge a block of wood between the deck and the blade to stop it turning, then loosen the centre bolt while holding the blade steady with a gloved hand. Most mowers use a standard right-hand thread, so the bolt loosens counter-clockwise, but some models, particularly certain ride-on and larger mowers, use a reverse thread instead. Check the manual before forcingCovering plants to exclude light and speed early, tender growth in the dark, most associated with rhubarb and sea kale in late winter. Full definition → it, since applying force the wrong way can round off the bolt head or strip the mandrel thread.
Before it comes free, mark which face was pointing down and note the orientation; most blades have a "this way up" marking embossed on them, and it needs to go back facing the same way. Getting this wrong doesn't just look untidy, a blade fitted upside down won't cut properly and can be unsafe to run.
Sharpening: file or grinder
Once the blade is off the mower, clean off any caked-on grass and dirt so you can see the actual edge you're working with. There are two practical routes:
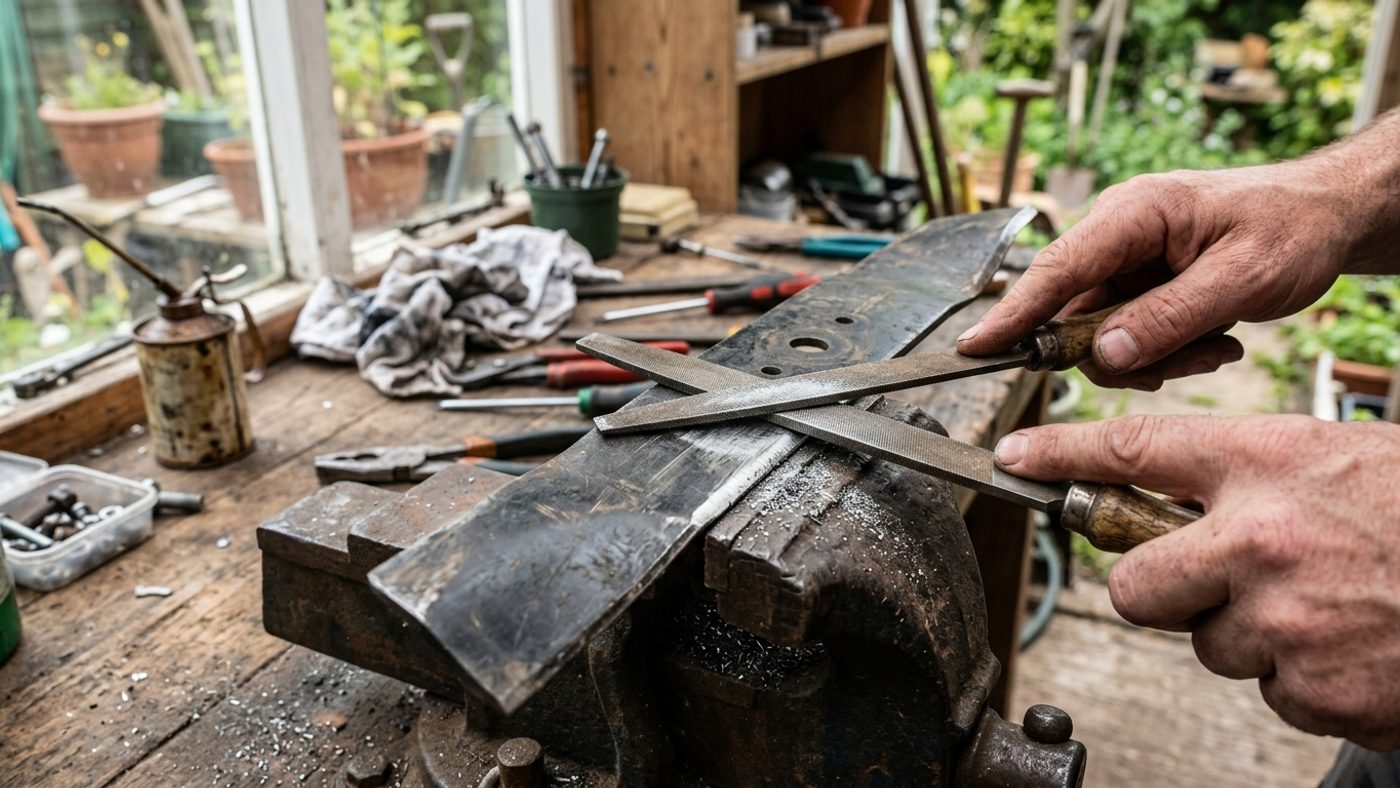
- By hand, with a file: clamp the blade in a vice and work the file across the cutting edge in one direction only (not back and forth), following the existing bevel angle rather than inventing a new one. Rotary mower blades typically leave the factory at around a 30-degree bevel; preserve whatever angle is already on the blade rather than guess a number from scratch.
- With a grinder: a bench or angle grinder removes material faster and is the more common choice if the edge is significantly worn, but it's easier to overheat the steel (which can soften it) or take off too much metal in one pass. Light, even passes are safer than one aggressive one.
Whichever method you use, don't sharpen all the way to a knife-point. Leave a small flat margin, roughly a millimetre, rather than sharpening to a fine edge. A slightly blunter edge that's properly shaped and balanced cuts grass perfectly well and is safer to handle than a razor edge, which also dulls again faster.
Never sharpen a blade while it's still mounted on the mower.
Balancing the blade
This is the step it's genuinely tempting to skip, and the one that causes the most damage if you do. Filing or grinding by hand almost never removes exactly equal material from both ends, and even a small imbalance spins into a real vibration at mower blade speeds.
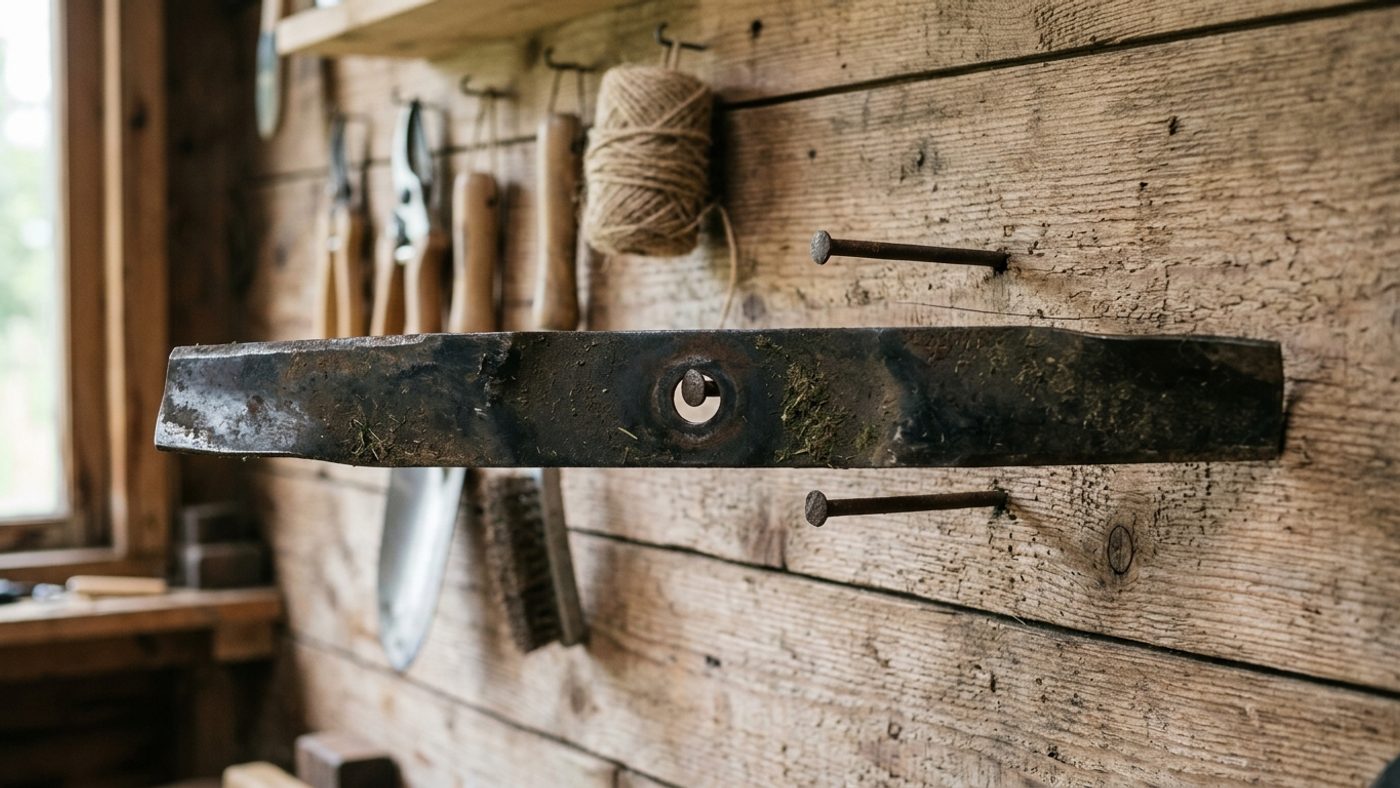
The standard home check: drive a nail into a wall or a beam, leaving about an inch exposed, then hang the blade on the nail through its centre hole. A balanced blade sits level. If one end drops, that end is heavier; take a little more material off it and test again, repeating until the blade hangs level. A basic blade balancer cone does the same job and can be quicker if you're sharpening blades regularly.
Skipping this step doesn't just cost you a smooth cut. An unbalanced blade left running can shake loose fittings, wear bearings prematurely, and in time damage the deck or the engine itself.
Refitting the blade
Line the blade back up so the marked face and orientation match how it came off, and make sure it seats correctly on the mandrel (the short spindle the blade boltsA plant switching early into flowering and seed production, usually triggered by stress, after which leaves, roots or bulbs turn bitter or unusable. Full page → onto, driven directly by the engine or motor) before you start tightening. On many mowers there's a star-shaped or D-shaped fitting on the mandrel that has to align with the centre hole of the blade, not just rest on top of it. If the bolt or its washers are worn, rounded, or corroded, replace them rather than reuse them; they're cheap, and a worn bolt is more likely to work loose. A light smear of grease on the mandrel shaft before refitting helps the blade come off more easily next time and guards against the shaft rusting on between sharpens.
Torque matters more than it might seem: too loose and the blade can work its way free in use, too tight and the mandrel thread can strip. The right figure depends on the mower's size, since a bigger deck and heavier blade need more clamping force to stay put at speed.
| Mower type | Typical centre-bolt torque |
|---|---|
| Push/walk-behind mower | 30-35 ft-lb |
| Ride-on/larger mower | 45-55 ft-lb |
These are ballpark manufacturer figures, not a substitute for checking your own mower's manual, since exact specs vary by model. If you don't have a torque wrench, tightening it firmly with a standard socket wrench and checking it again after the first mow is a reasonable fallback, but the manual figure is the one to aim for if you can get hold of it.
How often to sharpen
There's no single number that fits every mower and every lawn: a mower cutting a small, tidy lawn on soft ground wears its edge far more slowly than one working a larger area with any grit, sand, or stony ground in the mix. As a general guide, manufacturer maintenance advice points to sharpening (or having it sharpened) after roughly 20-25 hours of cutting time, alongside regular visual inspection between sharpens for the wear signs covered above. For most home lawns that works out to somewhere around once or twice a mowing season, but let the ragged-cut symptom override the calendar if the two disagree.
The removal, sharpening and balancing steps above are the same wherever you're mowing, but how often you actually reach for the file varies with what you're cutting and where. Thin, stony soil over rock is common across much of Scotland, and grit or small stones thrown up onto the lawn surface blunt and nick an edge faster than mowing on a stone-free lawn does; mowing wet or heavy grass more often, and through a longer damp season, adds to that, since more cutting hours and more clogging both push toward the shorter end of the sharpening interval rather than the longer one. If wet-weather mowing is a regular feature of your lawn, see can you mow a wet lawn? for the wider picture on cutting in damp conditions.
That same stony ground and damp storage air blunt hand tools faster too, though the technique for secateurs, loppers and spades is different from a power blade. Sharpening Garden Hand Tools → covers whetstones, diamond files, and the anvil-versus-bypass distinction.
Common questions
Can I sharpen a mower blade without taking it off the mower?
It's not recommended. Sharpening in place makes it far harder to see the full edge, keep the angle consistent, or check balance properly, and it puts your hands much closer to a blade that could still move. Take the blade off first.
How do I know if I should sharpen or just replace the blade?
If the edge is simply dull but the blade itself is straight and undamaged, sharpening is fine. If there are nicks, dents, cracks, or the blade is bent, replace it: sharpening won't fix structural damage, and running a damaged blade is a safety risk. Buy the exact replacement part for your model rather than a generic 'universal' blade: length, centre-hole size, and bolt-hole spacing all have to match, and a blade that's the wrong offset or length can hit the deck or throw the mower badly off balance. A retired blade is scrap metal, not household waste: most local recycling centres take it in the metal skip rather than general refuse.
Why does an unbalanced blade matter so much?
At the speed a mower blade spins, even a small weight difference between the two ends creates real vibration. Left unchecked, that vibration can loosen fittings, wear out bearings, and eventually damage the deck or the engine, not just make the cut look worse.
Is a file or a grinder better for sharpening?
A file gives more control and is harder to overheat the steel with, which suits a light touch-up. A grinder removes material faster and suits a more worn edge, but it's easier to take off too much or heat the metal enough to soften it if you're not careful. Either is workable if you keep passes light and check the edge as you go.
Do I need to drain the fuel tank just to check the blade?
For a quick inspection, disconnecting the spark plug lead (or removing the battery on a cordless mower) is the essential safety step. Draining the fuel and closing the tap becomes more relevant if you're tipping the mower fully on its side for longer work, since some engines shouldn't run fuel or oil into the wrong place when tipped.
Sources
4 sources, recorded with what each was used for
- RHS: Lawn Mowing Guide: The description of blunt blades tearing grass, the safety instruction to switch off and unplug before touching blades, and the recommendation that cylinder mowers be sharpened professionally rather than at home
- STIHL: How to Sharpen a Lawn Mower Blade (manufacturer maintenance documentation): Signs of wear, the isolation steps for cordless/petrol/electric mowers, blade removal method, the ~30-degree sharpening angle reference, balance-checking method, and the 20-25 hour sharpening interval
- Husqvarna AU: Lawn Mower Blade Replacement Guide (manufacturer maintenance documentation): Damage-vs-sharpen criteria, the fuel-draining and spark plug disconnection removal steps, the orientation marking, mandrel alignment on refitting, the roughly 1mm edge guidance, and the torque ranges
- Husqvarna Support: Can I sharpen the blade on my walk-behind lawn mower? (manufacturer support documentation): The nail-balancing method and the warning that an unbalanced blade will eventually damage the mower or engine