
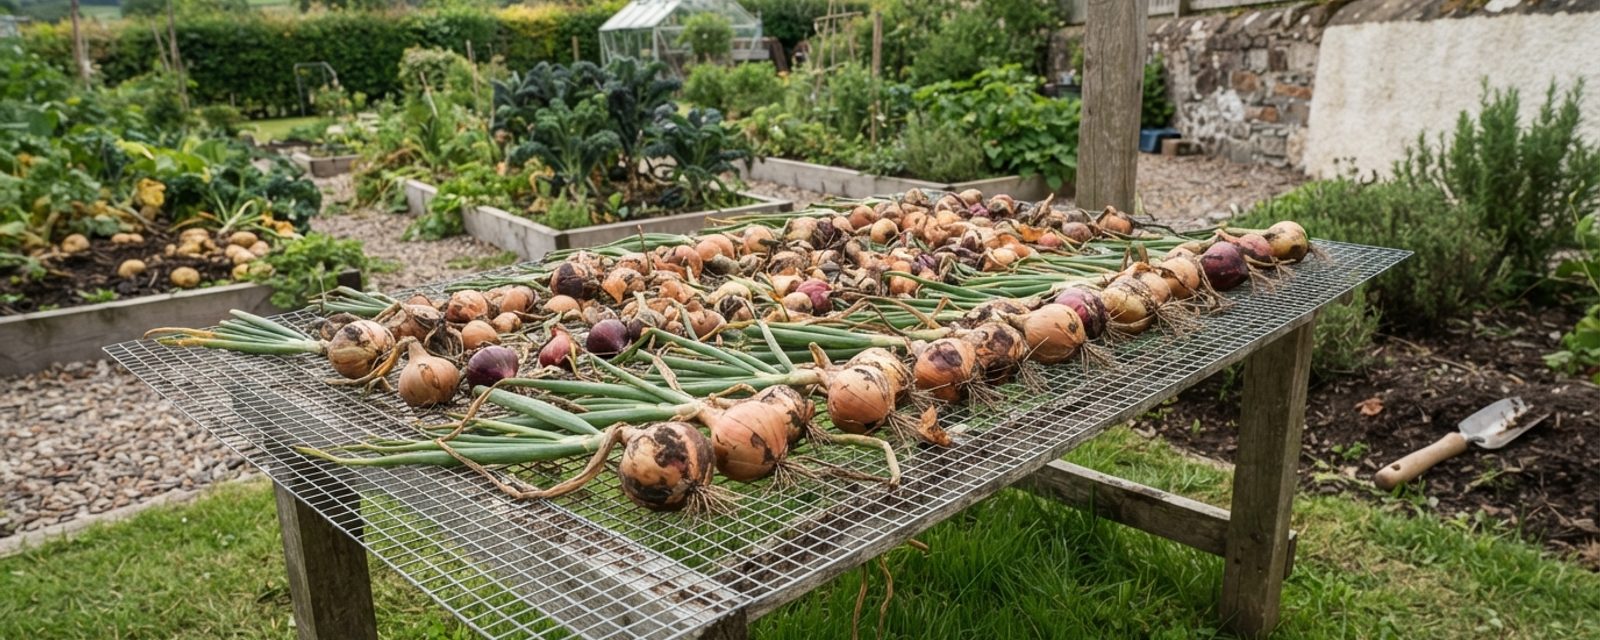
A bulb pulled from the ground is not ready for the pantry. It's still over 80% water, its outer skin is soft and easily torn, and its neck, the point where the leaves meet the bulb, is wide open. Left in that state, an onion or garlic bulb will start rotting from the neck down within days. Curing is the process that turns a wet, vulnerable bulb into something that will keep for months: it dries and hardens the outer scales into a papery wrapper, and it seals the neck into a dry plug that physically blocks the fungus responsible for most storage rot, commonly known as neck rot, from getting in. The outer scales aren't just packaging either. As they dry, their cells die off in a controlled way that also concentrates natural antifungal compounds in the skin, adding a chemical barrier to the physical one. Skip curing, or rush it, and neither barrier forms properly, however careful you were at every other stage of growing the crop.
For sowing, planting and working out exactly when to lift each crop, see the growing guides for onions, garlic and shallots. What follows is the part that happens after the fork comes out of the ground: how to cure each of the three properly, how long each one actually keeps, how to set up storage that works in a Scottish house or shed, and what to do when a bulb clearly isn't going to make it to spring.
How to tell a bulb is properly cured
Freshly lifted bulbs are still respiring and losing moisture through any cut or bruised surface, which is why a bulb that goes straight into a box without curing will often look fine for a week or two and then rot suddenly from the neck: that seal never formed.
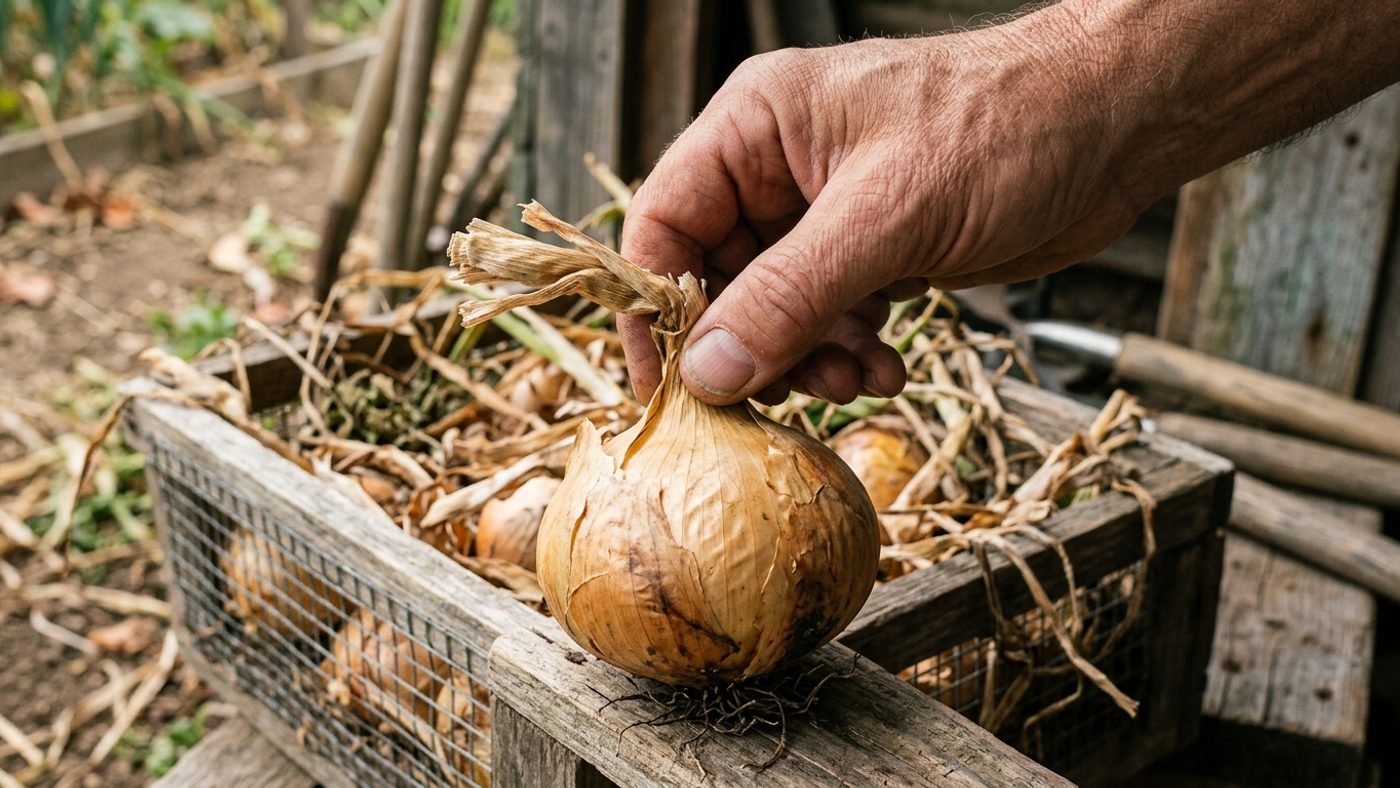
The give-away that curing is complete is consistent across all three alliums: the outer skin should be dry enough to rustle when you handle the bulb, and papery rather than fleshy. The neck should feel firm and dry all the way through, not soft or damp when you squeeze it. Bulbs that haven't reached that point after their normal curing window, usually because a wet autumn kept the drying slow or because they were harvested a little early, are not good storage candidates. Use those first rather than trying to force them to keep.
Curing method, step by step
The method is broadly the same for onions, garlic and shallots, with differences mainly in timing.
- Lift the bulbs carefully with a fork rather than pulling, and handle them gently. Bruised or nicked bulbs don't store well regardless of how well they're cured, since any break in the skin is a route in for rot. Shallots grow as a cluster of bulbs from one set, so gently break the cluster apart into individual bulbs at this point rather than curing them still joined, which traps damp air between them.
- Lay the bulbs in a single layer, never stacked, somewhere air can move freely underneath them. Wire racks, slatted trays or a well-ventilated bench all work. Don't cut the foliage or roots off yet.
- Cure outdoors in full sun if the weather allows it. If it's wet, move the bulbs under cover: a greenhouse, a polytunnel, or a dry, well-ventilated shed with the doors and windows open. For garlic specifically, avoid anywhere that gets hotter than around 30°C, since excessive heat can damage the cloves rather than help them dry.
- Leave them until the foliage and outer skin are fully dry, papery and rustling, not just dry to the touch on top. Turn or check them periodically so all sides cure evenly.
- Once cured, trim the roots close to the base and cut the foliage back to a couple of centimetres above the bulb, or leave it long if you're planning to plait. Any bulbs with soft necks, green patches, or skin that hasn't fully dried should be set aside for eating first, not stored.
How long each one actually takes, and how long each one keeps
Onions, garlic and shallots are often treated as interchangeable in storage advice, but they cure at different rates and keep for meaningfully different lengths of time. Garlic in particular needs a longer curing window than onions, and softneck garlic outlasts hardneck garlic by a wide margin in storage.
| Curing time | Typical storage life | Storage conditions | |
|---|---|---|---|
| Onions | About 2 weeks | Autumn-planted: until early winter. Spring-planted or seed-raised: well into the following spring | Light, cool, dry, well-ventilated. Avoid dark storage, it encourages sprouting |
| Garlic | 2 to 4 weeks, depending on the weather | Hardneck: 4 to 6 months. Softneck: up to a year | Cool, dry place at 5-10°C, where further drying continues |
| Shallots | About 2 weeks | At least 6 to 8 months | Light, cool, dry, well-ventilated. Avoid dark storage, it encourages sprouting |
Shallots are the standout keepers of the three, routinely outlasting onions from the same autumn planting. The one figure worth remembering beyond the table: hardneck garlic runs out fastest, often by midwinter from a late-summer harvest, so use it up first rather than saving it for spring.
RHS guidance for onions and shallots specifically warns against dark storage, saying darkness encourages sprouting, and recommends a light, cool spot instead. That runs against the older gardening convention of a dark larder or cellar, which some other sources still recommend for alliums generally. If you're choosing between a bright, cool porch and a genuinely dark cupboard, the light option has the stronger current backing for onions and shallots. Garlic's own storage advice is silent on light versus dark and focuses on temperature instead, so it's less clear whether the same logic applies there.
Plaiting and braiding
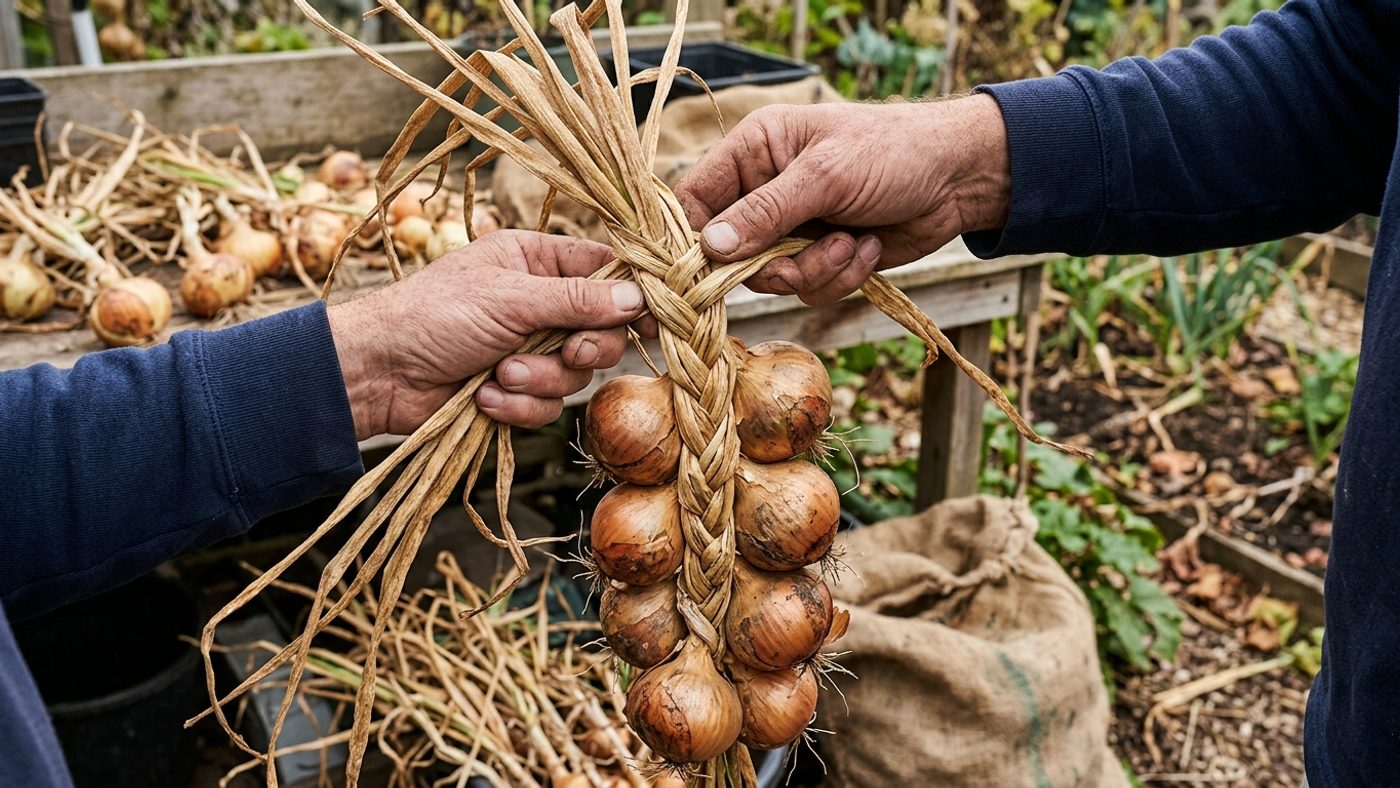
Plaiting is mainly done with softneck onions and softneck garlic, since the technique relies on pliable dried foliage, hardneck garlic's stiff central stem doesn't lend itself to it. It's a storage method as much as a display one: braided bulbs hang with good air circulation around every bulb, which matters more for keeping quality than most people assume.
- Cure the bulbs as normal but leave the foliage on and don't trim it back.
- Once the foliage is dry but still just pliable, not brittle, start with three bulbs of similar size. Tie their necks together loosely with garden twine or a spare piece of foliage.
- Braid the three stems together as you would hair, adding a new bulb into the plait every couple of turns, tucking its neck in against the braid rather than at the very end.
- Keep the bulbs snug against each other but not crushed, they still need air movement between them.
- Finish by binding the end tightly with twine and forming a loop for hanging.
- Hang the finished plait somewhere cool, dry and airy, out of direct damp and away from anywhere prone to condensation.
If your foliage has already dried brittle by the time you get to it, don't force a plait, it'll just snap. Net bags, trays or bunches are the fallback and work just as well for keeping quality, plaiting is really about ease of storage and inspection rather than a requirement.
Setting up storage in a Scottish house, shed or garage
The conditions all three alliums want are the same: cool, around 0-10°C, a relative humidity somewhere in the 60-70% range, ideally, and air moving around the bulbs rather than trapped and still. Too dry and the bulbs shrivel; too humid and rot gets a foothold, so a spare room or porch that isn't bone dry from central heating usually beats a sealed cupboard. Below freezing is a genuine hazard rather than just a discomfort: ice forms inside the bulb's cells, ruptures them, and turns the flesh soft and watery on thawing, so an unheated garage or shed that regularly drops below 0°C over a Scottish winter is a poor long-term store even if it's otherwise cool and dry enough.
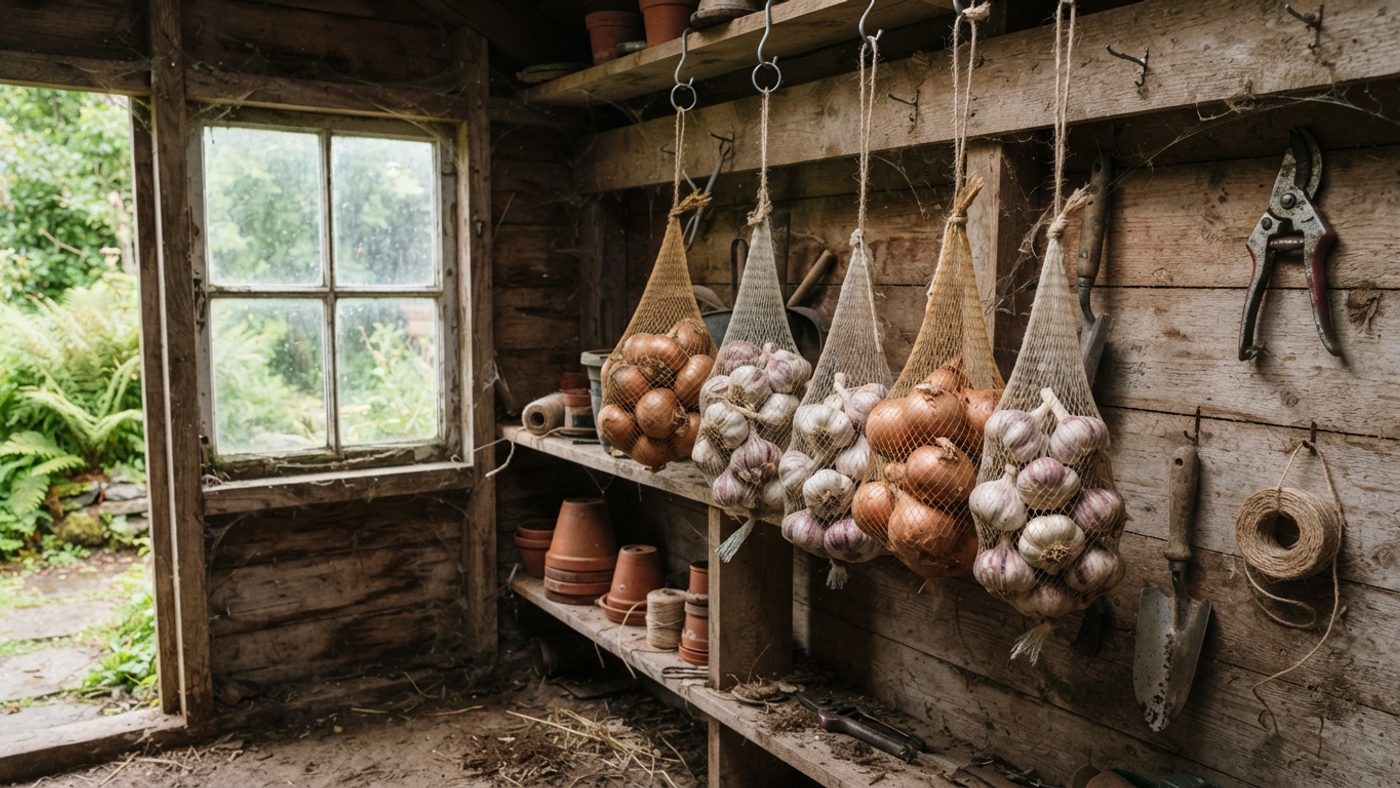
An unheated spare room, a porch, or a well-insulated garage that doesn't freeze hard are usually better bets than a kitchen, which tends to be too warm, or an outbuilding that floods with condensation on cold, damp nights. Most of those realistic options, a garage, a shed, an unheated porch, tend to be dim rather than bright, which sits awkwardly against RHS's light- storage advice for onions and shallots above. There's no published figure for how much light is enough, so treat it as a rule of thumb rather than a fixed target: a garage with a window or a porch beats a windowless cupboard, but don't go out of your way to rig up lighting for it. A shed works well for the drying stage but is a riskier long-term store, because a timber shed without good ventilation traps humidity through a wet winter, and damp air undoes curing slowly even after the bulbs looked properly dry going in. If a shed is the only option, raise the storage container off the floor, keep bulbs away from any wall that gets condensation, and check on them more often than you would in a drier space.
Net bags or old tights hung from a hook work well for small quantities and let you spot a rotting bulb early, since the smell and softness are obvious before it spreads. Slatted wooden crates or trays are better for larger harvests, stacked with a gap between each tray rather than nested directly on top of one another. Whatever the container, a single layer or loose hang, never a sealed bag or airtight box, is the rule, since trapped moisture is what turns a well-cured bulb into a rotten one over winter. Keep the store away from potatoes if you keep both: potatoes give off a gas called ethylene as they sit, and it can trigger onions and garlic into sprouting early.
Does Scotland's autumn actually make curing harder?
There's already a built-in weather contingency for exactly this situation: dry bulbs outdoors in full sun where possible, but move them into a greenhouse or well-ventilated shed if the weather is damp. That instruction isn't Scotland-specific, it applies anywhere the weather turns during the curing window, and a damp autumn makes incomplete curing, and the neck rot that follows it, more likely wherever it happens.
What is genuinely true, from UK Met Office climate data, is that Scotland has seen a larger rise in rain days than most of England over recent decades, with parts of the country picking up ten or more extra rainy days a year compared with the older baseline. That doesn't mean every Scottish autumn is wetter than every English one, but it does mean a Scottish gardener is more likely to hit the "weather is damp" branch of the curing instructions. In practice, that's a difference in how often you'll need the indoor fallback rather than a difference in method: expect to reach for the shed or greenhouse more often than the RHS's baseline "full sun" instruction implies, and don't be surprised if curing runs toward the longer end of the given ranges, particularly garlic's two-to-four-week window, in a wet year. There's no sign that Scottish-grown bulbs need a different storage method once cured, only that the indoor fallback for curing gets used more.
Spotting and dealing with spoilage in storage
Check stored bulbs every couple of weeks rather than assuming a good cure means no more attention is needed. The warning signs are consistent across all three:
- Soft neck or shoulders: press gently near the top of the bulb. Give here, rather than firm resistance, usually means rot has started internally even if the outside still looks fine.
- Sprouting: a green shoot pushing through the top means the bulb has broken dormancy. It's still edible but won't keep much longer, use it promptly.
- Visible mould, especially blue-green or black: remove the bulb immediately and check its neighbours, since mould spreads by contact and through shared airflow in a crate or bag.
- A sour or musty smell from a container: often the first sign of a rotting bulb hidden inside a bag or tray before it's visually obvious. Worth a full check whenever you notice it.
Remove any affected bulb as soon as you spot it rather than waiting for a full stocktake, one rotting bulb in a net bag or braid can take its neighbours with it. If you catch soft spots or sprouting early, the bulb is usually still fine to cook with immediately, it's storage life that's compromised, not necessarily the bulb itself.
Not all storage losses are rot. Bulbs lifted from ground that had onion fly or stem and bulb nematode earlier in the season can carry damage that only shows up in store as soft, discoloured patches under the skin rather than obvious external mould. There's no cure for either once a bulb is in storage, the only real prevention is watching for the pest in the growing crop and not storing anything that looked affected at harvest.
What to do with bulbs that won't store well
Not every bulb from a harvest is a storage candidate, and trying to force one to keep usually just means it fails in the store instead of the kitchen. Bulbs that never fully cured, that show any bruising or skin damage from harvest, that have thick or soft necks even after the normal curing window, or that are simply undersized, should go into the "use first" pile rather than into long-term storage.
For alliums that won't keep as whole bulbs, the practical options are freezing, pickling or dehydrating. Onions and shallots can be chopped and frozen raw, they lose their crisp texture but are fine cooked from frozen straight into soups, stews and sauces. Garlic can be frozen whole, peeled, or as a puree with a little oil. Pickling works well for shallots in particular and for small or oddly shaped onions, and dehydrating cloves or slices into onion or garlic powder is a way to use a surplus that's cured but too small or damaged to be worth storing whole. None of these extend the storage life of the fresh bulb itself, but they mean nothing from a harvest needs to go to waste just because it wasn't a good keeper.
It's also worth setting some of the best, healthiest bulbs aside as next year's planting stock rather than eating or storing the whole harvest, particularly with garlic, where saved cloves from a bulb that grew and cured well tend to suit your own plot better over a few years than fresh sets bought each season. Keep saved stock separate from the eating store and check it over again before planting, since anything showing soft rot or nematode damage should go on the compost heap, not back in the ground.
Common questions
Can I speed up curing by using a dehydrator or airing cupboard?
Low, gentle heat can work as a last resort in a genuinely wet autumn, but it's easy to overdo. RHS guidance for garlic specifically warns against temperatures above 30°C, since excess heat damages the cloves rather than helping them dry, and the same caution is sensible for onions and shallots.
My onions and garlic were ready around the same time. Do I need to cure them differently?
Broadly the same method works for both: single layer, good airflow, dry until the skin rustles, but the timings differ. Onions are usually done in around two weeks, garlic can take two to four. Check each crop's own skin and neck rather than curing them on a shared clock.
Why did some of my onions sprout in storage even though they looked properly cured?
Sprouting in storage is often about where they were stored rather than how they were cured. RHS guidance for onions and shallots specifically points to dark storage as a trigger for sprouting and recommends a light, cool spot instead.
Is it worth growing softneck garlic in Scotland just for the longer storage life?
The storage figures back this up: softneck garlic can keep for up to a year against four to six months for hardneck. Given Scotland's generally damp autumns make the curing window a bit less predictable, a variety with more slack in its storage life is a reasonable hedge.
How do I know if a bulb is cured enough to store, rather than just dry on the outside?
Check the neck, not just the skin. A cured bulb has a neck that's firm and dry right through when you squeeze it, not just a dry surface with softness underneath. If the neck gives at all, the bulb needs more curing time or should go on the use-first pile.
Sources
6 sources, recorded with what each was used for
- RHS: How to grow onions: Curing method and duration, storage conditions (light, cool, dry, avoid dark), storage duration by planting time
- RHS: How to grow garlic: Curing method and duration, maximum curing temperature, storage temperature range, hardneck vs softneck storage duration
- RHS: How to grow shallots: Curing method and duration, storage conditions, storage duration
- Journal of Experimental Botany: Differential response to heat stress in outer and inner onion bulb scales: Background on outer scale physiology during curing
- PMC (NCBI): Cellular and Molecular Changes Associated with Onion Skin Formation: The biological process by which onion outer scales dry down and form a protective skin during curing
- Met Office: Charting the UK's changing climate: The rise in annual rain days across the UK, with Scotland seeing a larger increase than most of England