
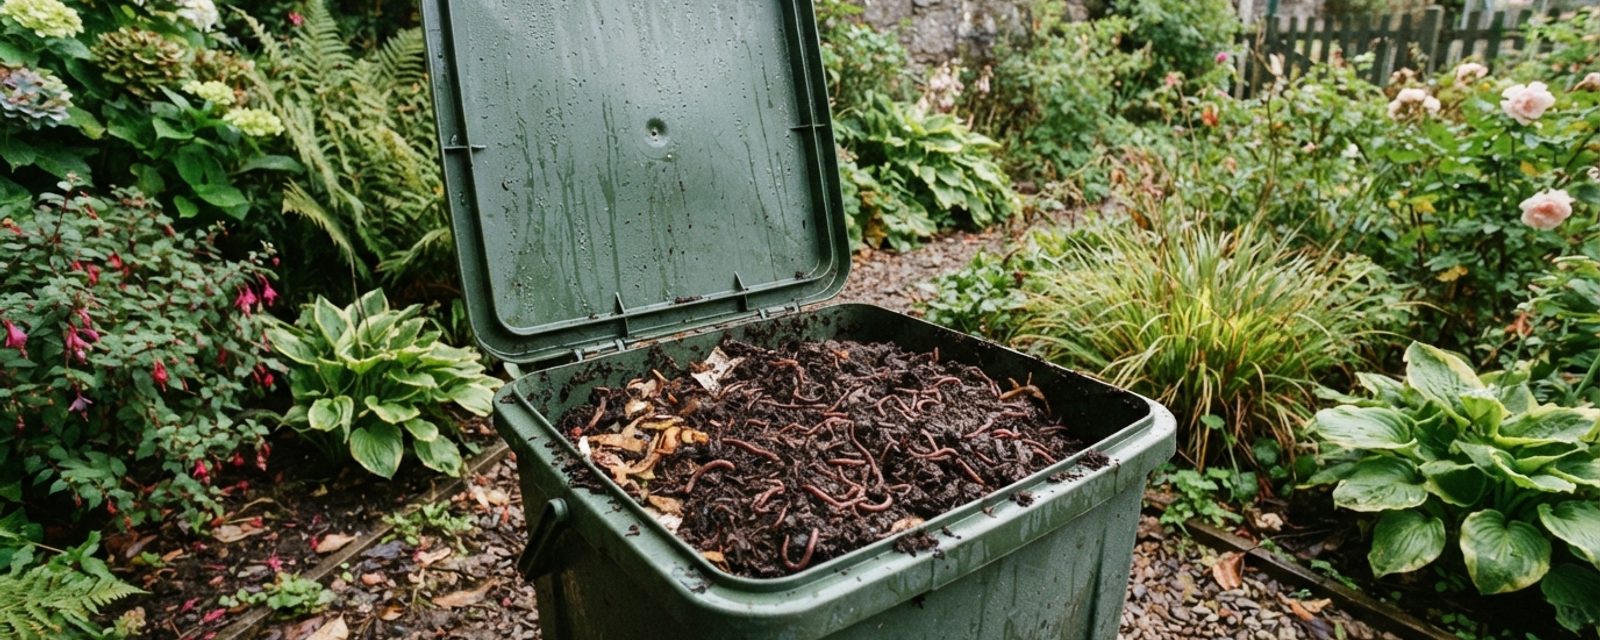
You lift the lid in March and something's wrong. The bin that was busy and slightly ripe-smelling in October is quiet now, a wet, cold mat of half-finished kitchen scraps, and when you dig through it there are far fewer worms than you remember putting in, some pale and sluggish, some just gone. Or maybe you're at the other end of this: a wormery kit arrived over the weekend, the trays are stacked on the kitchen table, and you're standing in the garden trying to work out where on earth to put the thing before the worms that came with it die in the box.
Both problems trace back to the same gap. A wormery is not a compost heap with worms added for good measure, it's a much smaller, much more exposed system, running on a species of worm that behaves nothing like the ones already living in your soil. Get that difference wrong and Scottish winters will find it.
What a wormery actually is
A wormery is a composting system built around a colony of worms, usually housed in stacked trays or a bin with a sump at the bottom. It typically has at least two compartments: an upper composting area where you add kitchen scraps and the worms live and feed, and a lower collection area that gathers the liquid that drains through, a concentrated feed, not compost itself, which gets diluted before use.
This is a different process from a compost heap. A heap is bacteria-driven: it heats up as microbes break material down, and that heat is part of what does the work. A wormery is aerobic and worm-driven, the worms need air, not heat, and worm composting doesn't generate warmth the way a hot heap does. That matters for winter, because a struggling compost heap can be revived by piling in more material and letting it heat back up; a struggling wormery can't warm itself the same way. It relies entirely on where you put it and how well you insulate it.
A wormery also isn't a substitute for a compost bin, it's suited to smaller volumes, mainly kitchen waste, not the bulk of garden clippings and prunings a heap handles.
Composting worms aren't the worms in your soil
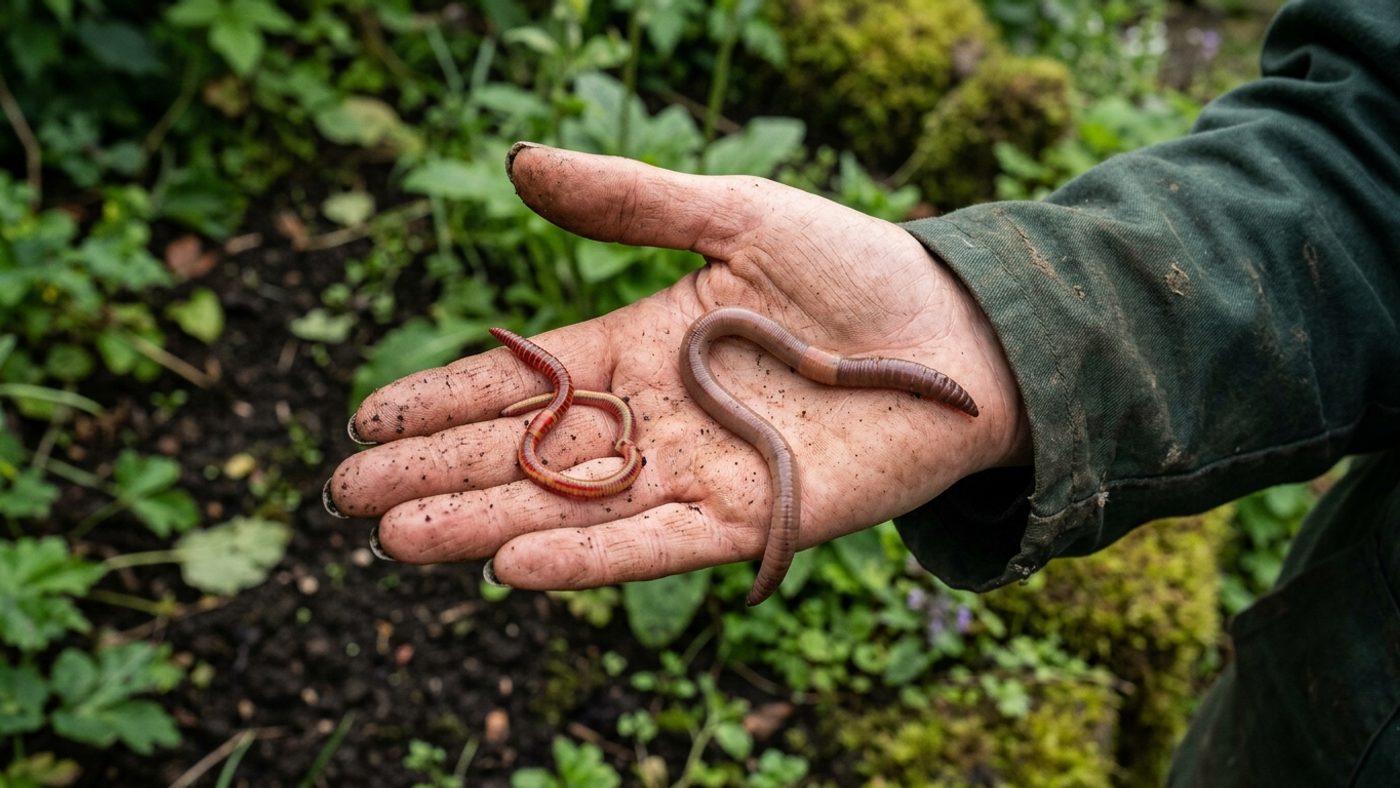
The worms used in a wormery are epigeic species, surface-dwelling composters that live in decaying organic matter rather than soil. The two most commonly supplied are Eisenia fetida (also spelled foetida, and sold as the brandling, tiger, or red worm) and Dendrobaena veneta. Both are usually reddish or noticeably striped.
That's a genuinely different animal from the earthworms already in your lawn and beds. Species like Lumbricus terrestris, the common "nightcrawler," live in permanent vertical burrows that can run well below the frost line, and it's mainly these deep-burrowing species that leave casts on the surface. Composting worms don't build burrows like that; they live in the top layer of whatever they're eating. That single fact is the whole reason winter is a real risk for a wormery in a way it isn't for the worms already in your garden: an ordinary earthworm can retreat downward, out of the cold, on its own. A composting worm confined to a plastic bin on your patio has nowhere further down to go than the bin allows.
Setting up a wormery
Siting it
Put the wormery somewhere sheltered that avoids extremes in both directions, not blazing summer sun, and not the coldest, most exposed corner of the garden in winter. A shed, or a sheltered spot against a house wall, works well; a kitchen or utility room is best avoided for an ongoing system, since a neglected bin can produce odours you don't want indoors. Raise it slightly off the ground on bricks or a stand if it isn't already, so air can move underneath and excess liquid drains freely rather than pooling.
Bedding
Start with roughly an 8cm layer of moist bedding, old compost or coir both work, before adding the worms. This gives them a stable base to settle into rather than putting them straight onto raw food waste.
Adding the worms and settling in
Add the worms to the bedding, then cover with a modest layer of kitchen waste, no more than about 8–10cm to start, and leave the system for roughly a week before adding more. Worms are most active in warm, moist conditions, ideally between 18–25°C, with activity noticeably dropping off below 10°C and above 30°C. A pH of 6.5–7.0 and good ventilation both help the colony establish. It typically takes a wormery around 8–12 months to fill and be ready for its first proper harvest.
What to feed it, and what to avoid
Composting worms will eat most raw and cooked vegetable matter, fruit, and small amounts of paper-based waste, but a few categories cause real problems: they either rot before the worms can process them, attract pests, or upset the colony's chemistry.
| Feed this | Avoid this |
|---|---|
| Raw and cooked vegetable peelings, fruit scraps | Meat, fish, bones, dairy, fat and grease, attract pests and flies |
| Tea bags, coffee grounds, crushed eggshells | Large quantities of onion, garlic, leek, shallot, cook or limit these first |
| Shredded newspaper, plain cardboard, small amounts of bread | Glossy magazines and heavily printed card |
| Citrus in small, cooked-first amounts | Large amounts of raw citrus peel, or tough, woody garden waste |
The general rule is little and often, not a lot at once: chop scraps small, and either bury each addition in a fresh spot or cover it with damp newspaper rather than leaving it exposed on top. Overfeeding is the single most common cause of a smelly, failing wormery, food that the worms can't keep up with simply rots.

An established wormery can go without fresh food for up to about four weeks if you're away, though the liquid will keep accumulating in the sump and needs draining so the system doesn't become waterlogged.
Winter survival: what actually happens to the worms
Eisenia fetida tolerates a working range of roughly 0–35°C, with its comfortable zone much narrower, that 18–25°C ideal, dropping off sharply below 10°C. Below freezing, the worms aren't simply "slow" the way they are at 8°C; a hard freeze in the bin itself is a real threat, not just a nuisance, because, unlike the deep-burrowing earthworms discussed above, they have no colder-but-safer layer to retreat to inside a surface bin.
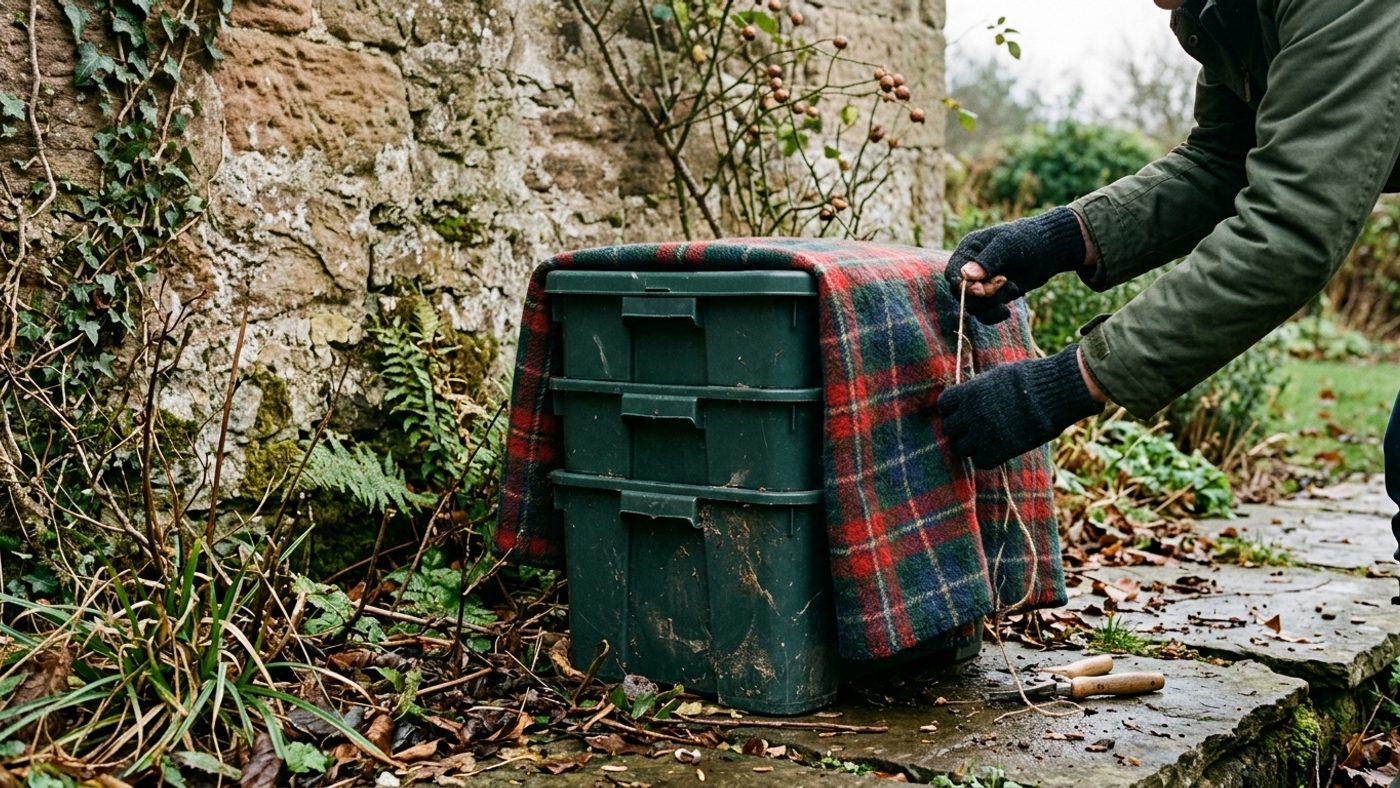
Left outside with just its own lid, an ordinary plastic wormery gives the colony some protection from the worst of the cold and wet, but that's a modest buffer, not real insulation, plastic is a poor insulator on its own. In genuinely frost-prone parts of Scotland, the practical response is to move a wormery that's small enough to carry into a shed, garage, or other sheltered, unheated but frost-buffered space for the winter months, which keeps both hard frost and driving rain off it.
Concrete insulation, if it has to stay outside
If moving it isn't practical, a large or built-in system, say, the same principle that keeps a compost heap ticking over in winter applies to a wormery's sides and lid: wrap or pack it. Siting it hard against a south- or east-facing house wall gives it some residual warmth from the building and cuts wind exposure on at least one side. Beyond that, wrapping the outside of the bin in old carpet, a moving blanket, or several layers of bubble wrap, and piling a thick layer of straw, dry leaves, or shredded paper over the surface inside the top tray, both help retain what warmth the system generates itself. Feed less as temperatures drop, a slowed-down colony processes less, and uneaten waste sitting cold and wet starts to rot rather than compost, turning sour and short of oxygen in a way that kills worms rather than just slowing them.
How much protection your wormery actually needs depends on where you are
This isn't uniform across Scotland. The number of days a winter month actually drops below freezing varies hugely by region and, within a region, by altitude, a coastal wormery and an upland one are not facing the same winter at all.
| Location | January air-frost days (avg) | December air-frost days (avg) |
|---|---|---|
| Islands (Stornoway, maritime) | 4.7 | 5.5 |
| Central Belt lowland (Edinburgh) | 9.0 | 10.4 |
| Deeside/Cairngorm fringe, upland (Braemar, ~339m) | 17.3 | 17.0 |
Braemar records frost in every month except July, and its frost-free season can run to as little as three months, a wormery there needs the shed-or-garage treatment as standard, not as a precaution for an unusually hard winter. A sheltered coastal garden with only a handful of freezing days a month can often get away with a well-wrapped bin against a wall. The fuller regional and lowland/upland breakdown, including your own postcode band, is at Scotland's frost dates.
Troubleshooting
Worms escaping
Worms climb out under the lid for several practical reasons: the bin is too wet or too acidic, too warm, poorly ventilated, short of food, overcrowded, or the conditions have simply changed suddenly (a heavy feed, a change in weather). Check moisture and food levels before assuming anything's seriously wrong.
Smells
Almost always overfeeding, remove any undigested surplus. Waterlogging is the second most common cause; drain the sump and add shredded paper or card to soak up excess moisture and improve airflow. If the smell persists once those are fixed, the system may have turned too acidic; a light dressing of calcified seaweed or garden lime can correct it, but it's worth testing pH rather than guessing.
Fruit flies
Harmless but annoying, and drawn to exposed food waste with a strong smell. Bury each new addition in the existing material or cover it with a layer of damp newspaper rather than leaving it on the surface, that alone stops most infestations. Avoid chemical treatments, which are as likely to harm the worms as the flies.
A sluggish or empty wormery after winter
If your bin looked like the one at the start of this article, wet, quiet, and short on worms, the most likely explanation is exactly the mechanism above: the colony went through a hard freeze it had no way to escape, in a system that wasn't insulated or moved for the coldest months. Treat it as a sign to change the winter setup before restocking, not just a bad season to shrug off, the same bin, sited and wrapped the same way, will do the same thing again next winter.
Harvesting the compost and liquid feed
The worms tend to gather in the layer just below the most recent food, so the simplest harvest method is to remove the older, finished layers from below and around them and use that as compost, leaving the worms behind with the newer material to keep working. An alternative for a full bin: tip the contents out onto plastic sheeting in daylight, mound it, and let the top layer dry slightly, the worms will migrate down and inward away from the light and drying surface, letting you skim off finished compost from the outside of the mound in stages.
The compost itself is rich in nitrogen and potassium and works well as a soil conditioner or mixed into potting compost. The liquid collected from the sump is a concentrated feed, not a finished product, dilute it at roughly 1 part liquid to 10 parts water before using it on plants, and use it reasonably promptly rather than letting it sit for long periods.
Common questions
Do wormery worms die if the bin freezes solid?
Composting worms have a much narrower comfortable range than the soil-dwelling earthworms already in your garden, and unlike those species they can't retreat into deep, frost-free burrows, a surface bin is all the depth they have. A hard freeze is a real risk to the colony, which is exactly why insulation or moving the bin matters more here than "keep it somewhere reasonable" advice written for milder parts of the UK.
Can I keep a wormery indoors over winter instead?
A shed or garage, sheltered but unheated, is the usual recommendation; a wormery is generally not suited to a kitchen or utility room long-term, since a system that’s forgotten about for even a short stretch indoors can start to smell.
How long does it take to get a first harvest?
Around 8 to 12 months from setup to a full bin ready for its first proper harvest, though you can start using the liquid feed much sooner once the system is established.
What's the single most common mistake with a new wormery?
Overfeeding. Little and often beats a large single addition, a big feed decomposes faster than the colony can process it, and that's what causes both smell and worm losses.
Sources
6 sources, recorded with what each was used for
- RHS: Worm composting: Setup process, bedding depth, temperature/pH ranges, feeding do’s and don’ts, harvesting methods, troubleshooting (odour, fruit flies, neglect tolerance)
- RHS: Earthworms: The distinction between deep-burrowing soil earthworms (Lumbricus terrestris and relatives) and the surface-dwelling composting species used in wormeries; general earthworm dormancy behaviour
- RHS: Composting through the winter: Winter wormery care, relocating to a shed/garage in frost-prone areas, feeding less as temperatures drop, general compost-bin insulation principles
- Garden Organic: Earthworms: Epigeic (compost-dwelling) worm identification and role, worm cast nutrient content
- Garden Organic: Composting (FAQ): Causes of worms escaping a bin
- Met Office: Location-Specific Long-Term Averages: Source underlying the site’s own regional air-frost-day figures used in the comparison table