
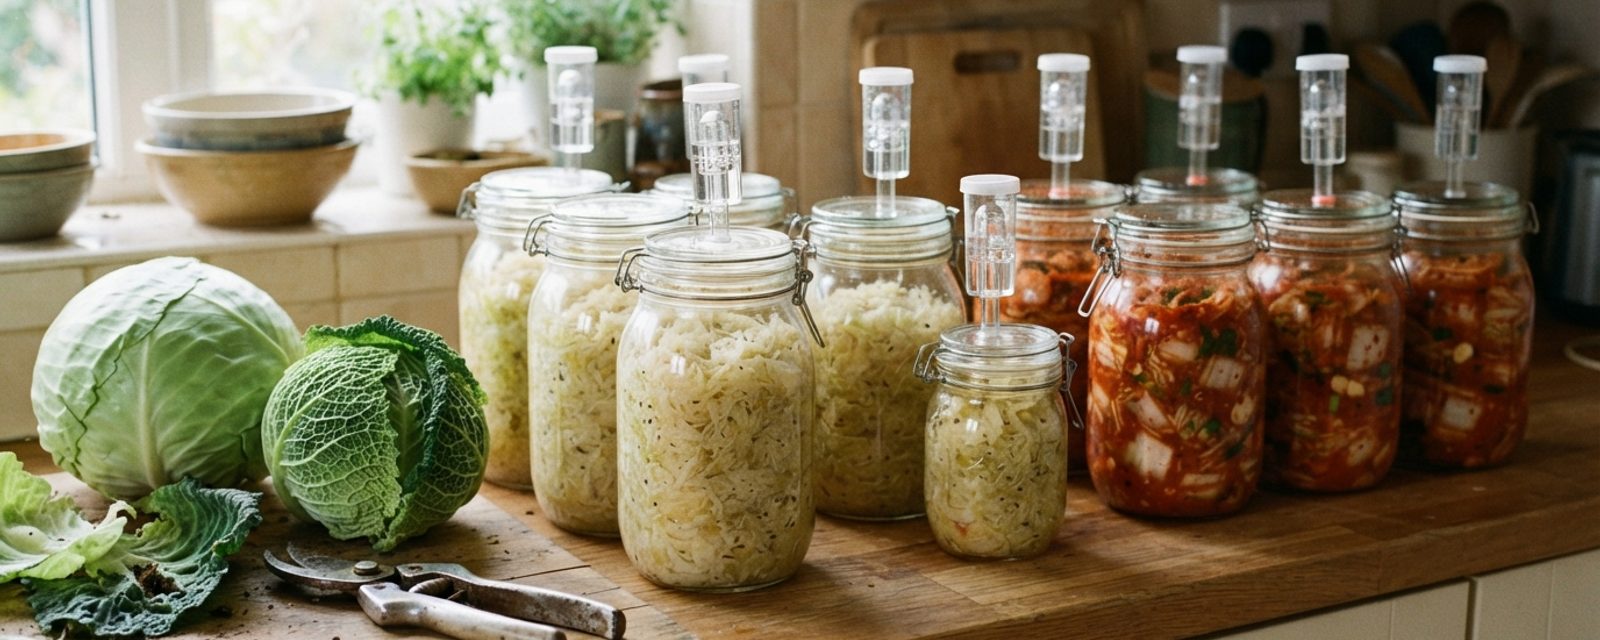
Fermenting a cabbage is not a leap of faith, it's a controlled process with a clear mechanism, and once you understand the chain of events, the whole thing stops feeling like a gamble.
What's actually happening in the jar
It starts with salt. When salt is worked into shredded cabbage, or rubbed onto the surface of a whole vegetable, it draws water out of the plant's cells by osmosis. Salt outside the cell is more concentrated than the water inside it, so water moves out through the cell walls to even things out. That water carries the vegetable's natural sugars with it, and together they form the brine that the vegetable then sits in.
That brine is doing more than one job. First, it's simply covering the vegetable, which matters enormously (more on that below). Second, and this is the part most people never have explained to them, it creates conditions that favour one particular group of microbes over all the others.
Every fresh vegetable arrives covered in a mixed population of microorganisms, including the lactic acid bacteria that will do the actual preserving. Left alone, a cut cabbage would be colonised by whatever bacteria and moulds happened to get there first, some of which spoil food and some of which can make people ill. Salt changes those odds. The National Center for Home Food Preservation notes plainly that "salt favors the growth of desirable bacteria while inhibiting the growth of others", the lactic acid bacteria already living on the vegetable's surface tolerate a salty environment far better than most spoilage organisms and pathogens do, so as the salt concentration rises, the competition tips decisively in their favour.
Once that competition is settled, the lactic acid bacteria get to work fermenting the sugars in the brine, and the byproduct of that fermentation is lactic acid. As lactic acid accumulates, the pH of the brine drops, a successfully fermenting batch of sauerkraut typically falls to somewhere around pH 3.5, sometimes lower. That acidity is what actually preserves the vegetable: it's inhospitable to the pathogens and spoilage organisms that could otherwise take hold, in the same way vinegar preserves a pickle, except here the acid is produced in the jar rather than added to it. The salt starts the process by picking the right microbial team; the acid that team produces is what finishes the job.
This is why the National Center for Home Food Preservation is emphatic that home fermenters should not improvise on the salt: "Do not attempt to make sauerkraut or fermented pickles by cutting back on the salt required." Cut the salt and you don't just get a milder ferment, you remove the mechanism that keeps the wrong organisms out in the first place.
The salt percentage that matters
For a straightforward vegetable ferment like sauerkraut, roughly 2% of the vegetable's weight in salt is the standard starting point, and it's worth understanding why that particular figure, rather than "a good pinch," is the one that gets used.
Go too low and the salt can't do its selective job properly, spoilage organisms and pathogens are no longer meaningfully disadvantaged relative to the lactic acid bacteria, and they can get a foothold before the ferment acidifies enough to shut them out. Go too high, and the salt starts working against you in the opposite direction: at high enough concentrations it inhibits the lactic acid bacteria too, along with everything else, and the ferment stalls or never really gets going. The 2% figure sits in the range that reliably favours the lactic acid bacteria without suppressing them. It's standard kitchen chemistry, the same figure whether the kitchen is in Aberdeen or Atlanta.
To work out 2% of a batch by weight:
- Weigh the trimmed, cored vegetable before shredding, the part you're actually going to ferment.
- Multiply that weight by 0.02.
- That's the weight of salt to use. For 1kg of trimmed cabbage, that's 20g of salt; for 2.5kg, 50g.
The National Center's own published sauerkraut recipe works out close to this range in practice: it calls for 3 tablespoons of canning or pickling salt per 5 lb (about 2.3kg) of cabbage, worked in batches, which lands around 2–2.5% by weight once you account for the density of fine canning salt. Use a kitchen scale rather than volume measures where you can, since a "tablespoon" of salt varies noticeably depending on how fine or coarse it is.
Use plain salt, canning, pickling, or fine sea salt without anti-caking agents or iodine, both of which can interfere with fermentation or cloud the brine. "Canning salt" specifically is an American product name and isn't something you'll find on a UK supermarket shelf; plain fine sea salt or kosher-style salt, checked for an additive-free ingredients list, is the equivalent to look for here. Ordinary table salt with additives is best avoided. The water matters too: strongly chlorinated tap water can slow fermentation, so if your water is heavily chlorinated, leave it standing uncovered for a few hours first, or use filtered water, to let the chlorine dissipate before making up any extra brine.
The one rule that matters more than any other: keep it under the brine
If there is a single practical step that determines whether a ferment succeeds, it's this: every piece of vegetable has to stay fully submerged under the brine for the whole fermentation period. Anything that pokes up above the surface and stays exposed to air is at risk of mould, and once mould takes hold on an exposed piece it can spread.
The lactic acid bacteria that are protecting the batch work without oxygen, while the moulds that spoil an exposed ferment need it, which is the whole reason submersion is the step that matters most, not a tidiness habit borrowed from elsewhere.
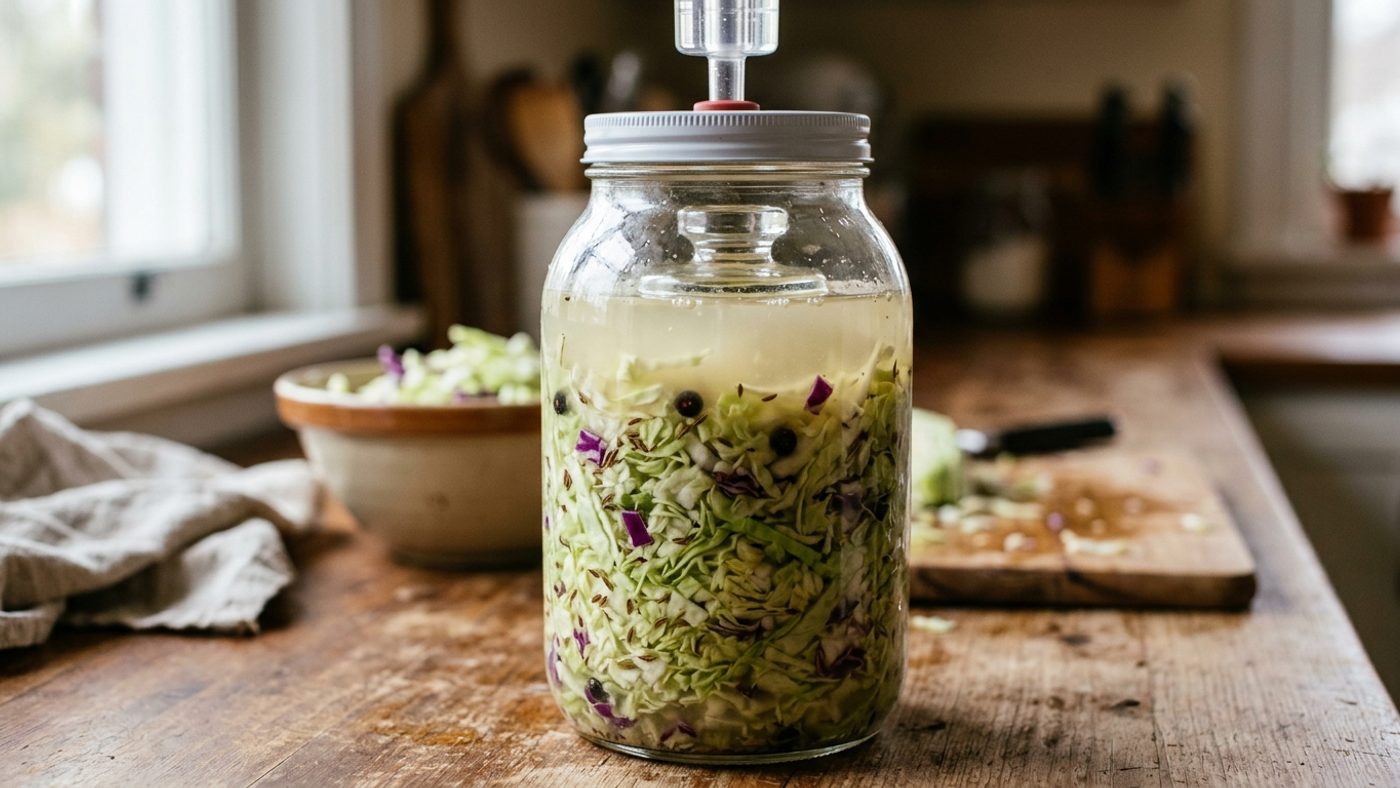
In practice, this means weighting the vegetable down so it can't float up as gas bubbles form during fermentation. Sensible options, in rough order of how commonly they're used:
- A plate or follower disc that sits just inside the rim of the container, weighted down with something clean and heavy, the National Center for Home Food Preservation describes using a dinner or pie plate slightly smaller than the container opening, held down with two to three sealed jars filled with water.
- A water-filled bag as the weight itself, a heavy food-grade plastic bag filled with a few litres of water sits directly on top of the vegetable and moulds itself into the container, pressing everything below the surface. If the bag leaks, plain water dilutes the brine slightly rather than spoiling it outright, so it's a safe option even without special preparation.
- Purpose-made fermentation weights, usually glass or ceramic discs sold for the job, used inside a wide-necked jar.
Whatever method you use, check the batch every few days. If any scum forms on the surface of the brine, skim it off, it's made up of wild yeasts and bacteria feeding on the surface, and if it's left to build up it can start eating into the acidity that's protecting the rest of the batch. It isn't itself a reason to discard the ferment, but it needs removing.
A loose cover over the container, a clean tea towel, or a lid set on but not sealed, keeps out dust, fruit flies, and stray mould spores while still letting the gas produced by fermentation escape. A purpose-made fermenting lid with a built-in airlock (widely sold for standard wide-mouth jars) does the same job automatically, releasing gas without needing to be checked and re-loosened, and is a reasonable upgrade once you're fermenting regularly rather than a requirement for a first batch.
Is it working, or has it failed? Reading the signs correctly
This is where most first-time fermenters lose their nerve, usually over things that are completely normal.
Normal, expected activity, leave it alone:
- Cloudy brine. This is the lactic acid bacteria themselves, multiplying in suspension. A clear ferment is often a sign that nothing much is happening yet, not a sign of purity.
- Bubbling, fizzing, or a steady stream of small bubbles rising through the brine. This is carbon dioxide, a direct byproduct of the fermentation. Vigorous bubbling in the first week is exactly what you want to see. As fermentation completes, the bubbling slows and eventually stops, that's one of the signs the batch is ready.
- A sour, tangy smell, growing more pronounced over the fermentation period. This is the lactic acid doing its job.
Genuine spoilage, discard the batch, no exceptions:
- Pink or orange mould, or mould of any colour, anywhere in the container. A thin white film on the surface of the brine (sometimes called kahm yeast) is a separate, less serious issue that can often be skimmed off if caught early, but coloured mould, especially pink or orange, growing on the vegetable itself or the brine is not something to skim around. If it has taken hold below the surface or on the vegetable, the batch should be thrown out.
- A rotten or putrid smell, as opposed to the sharp, sour smell of a working ferment. Fermentation should smell sour and appetising, not foul.
- Sliminess on the vegetable itself, rather than the normal slight softening that comes with fermentation.
Any one of those three, coloured mould, a putrid smell, or slime, means the batch has failed and should be discarded, not rescued. Don't taste-test a batch showing any of these signs to check.
Soft or mushy results (short of sliminess) usually trace back to one of a few causes: too little salt, brine that didn't stay above the vegetable throughout, or a fermentation temperature that ran too warm. These affect texture and quality rather than necessarily making the batch unsafe, but they're worth troubleshooting for next time, check your salt weighing, your submersion setup, and where the jar is sitting.
Temperature and fermentation speed
Fermentation is far more sensitive to temperature than jam-making or chutney-making, where a rolling boil does the same job regardless of the room around it. Published American guidance for sauerkraut gives a clear picture of how much temperature changes things:
| Room temperature | Typical fermentation time |
|---|---|
| 21–24°C (70–75°F) | 3–4 weeks |
| 15–18°C (60–65°F) | 5–6 weeks |
| Below 15°C (60°F) | May struggle to get going at all |
| Above 24°C (75°F) | Ferments faster, but the kraut is more likely to turn soft rather than crisp |
That data comes from a US extension source working in a US kitchen, so treat the exact week counts as a rough guide rather than a promise, but the underlying relationship, that cooler means slower, is the meaningful takeaway.
Nobody's measured Scottish kitchen temperatures against that American table specifically, but the same logic applies: most Scottish homes aren't heated to 21–24°C on a worktop outside summer, so many ferments here will land nearer the cooler, slower end of the table above than the warm end. That's not a disadvantage: a slower, cooler ferment is generally easier to keep an eye on and less prone to the softening that comes with fermenting too warm. It does mean building in more patience than a recipe written for a hot climate might suggest, and checking progress by the signs above rather than by a fixed number of days. If a batch shows no bubbling at all after a week or so, the likeliest cause is a genuinely cold spot, an unheated porch or outbuilding rather than the kitchen itself, and moving it somewhere warmer, near the boiler, in an airing cupboard, or just onto a kitchen worktop, is the fix, rather than waiting longer in the cold.
Sauerkraut: the reference ferment
Dense, tightly-headed cabbage types ferment better than loose, leafy ones, the firmer heads shred into pieces that pack down tightly with little air trapped between them, and hold their texture through weeks of fermentation rather than turning to mush. A firm white or red storage cabbage, such as January King or Tundra, or a Savoy-type winter cabbage, is a better choice than loose spring greens, and this is also exactly the point in the season when a dense storage or winter cabbage is being harvested and needs using up, a genuine glut moment rather than an odd time to start a ferment. For growing the cabbage itself, types, spacing, sowing times, and variety choice, see the cabbage growing guide; if there's more cabbage than the ferment pot can take, storing cabbage for winter keeps the rest in good condition until it's needed.
Red cabbage ferments the same way and by the same salt logic, but expect the colour to shift: the brine usually turns a deep pink or magenta as the pigment leaches out, and this is a normal colour change, not a sign of the pink mould described below, mould sits on the surface or on the vegetable itself as a distinct growth, rather than tinting the whole brine evenly.
Before shredding a homegrown cabbage, check between the leaves for slugs, aphid colonies, and caterpillars, and cut away any damaged or slime-trailed outer leaves. A pest picked up in the garden doesn't get removed by fermentation, it just ends up in the jar.
What you'll need
A clean glass, food-grade plastic, or stoneware container with a wide enough opening to pack and weight the vegetable; something to weight it down (a plate and weighted jars, a water-filled bag, or purpose-made fermentation weights); a kitchen scale; and plain salt without additives. Avoid bare, uncoated metal anywhere it'll touch the brine, the acid produced during fermentation reacts with it, so stick to glass, food-grade plastic, stoneware, or stainless steel.
Method
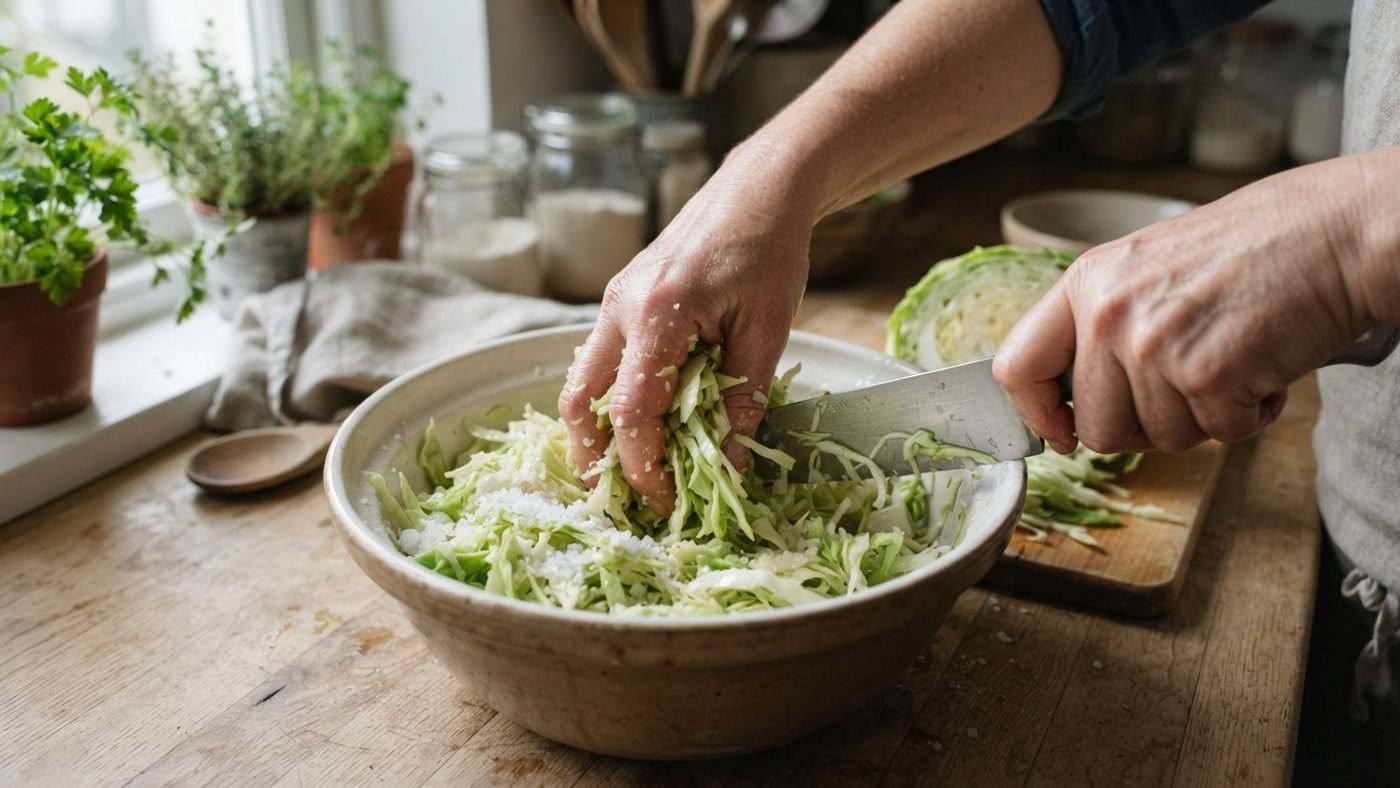
- Trim and core the cabbage, removing any damaged outer leaves, and weigh what remains.
- Calculate 2% of that weight in salt (see above).
- Shred the cabbage finely, about the thickness of a coin is typical.
- In a large, scrupulously clean bowl, work the salt into the shredded cabbage with clean hands, squeezing and massaging it as you go. Within ten to twenty minutes you should see liquid pooling in the bowl, that's the osmosis described earlier, drawing brine out of the cabbage.
- Pack the cabbage tightly into a clean fermentation container, pressing down firmly as you go to force out air pockets and bring the brine up over the top of the cabbage. If the cabbage's own liquid doesn't fully cover it, top up with a spare brine made at the same roughly 2% strength (about 1½ tablespoons of salt per quart/litre of water).
- Weight the cabbage down so it stays under the brine, and cover loosely.
- Leave at room temperature, checking every few days for the normal signs of fermentation and skimming any surface scum.
- Fermentation is complete once bubbling has stopped, typically after three to six weeks depending on room temperature. At that point, sauerkraut can be moved to the fridge, where it will keep well for several months, or eaten fresh. Turning finished sauerkraut into a shelf-stable, cupboard-stored product is a separate process (proper water-bath canning, not just jarring it up) with its own safety rules, treat fridge storage as the default unless you're following dedicated canning guidance.
Kimchi: the same chemistry, a different build
Kimchi runs on exactly the same underlying process as sauerkraut, salt draws out water and favours lactic acid bacteria, those bacteria produce lactic acid, the drop in pH preserves the batch, and submersion under brine or paste matters just as much. What's different is the shape of the process rather than the chemistry behind it, because kimchi typically involves more than one vegetable, a distinct pre-salting stage for the cabbage, and a seasoning paste that goes in before fermentation starts rather than after.
Traditional kimchi is made with napa (Chinese) cabbage, which isn't a crop widely grown in Scottish gardens or sold as readily as ordinary cabbage. If napa isn't available, a firm, dense winter cabbage of the kind recommended for sauerkraut above is a reasonable substitute, the salting, seasoning and fermentation steps below all work the same way; only the leaf shape and texture change.
What's genuinely different
The cabbage is salted and brined before anything else happens. Napa cabbage (or its substitute) is usually cut into quarters or large pieces, then either rubbed with dry salt in layers or soaked in a strong brine, for anywhere from one to several hours, until the leaves have visibly softened and become pliable rather than crisp. This is the same osmotic mechanism as sauerkraut, just applied as a discrete brining step rather than worked in all at once, the goal is to draw out enough water that the cabbage bends without snapping, and to build in the salt level the ferment will need. The cabbage is then rinsed to remove excess surface salt and drained well.
A seasoning paste carries flavour and, often, additional vegetables. A typical paste combines Korean chilli flakes (gochugaru), garlic, ginger, and often a savoury element such as fish sauce or a salted-shrimp paste, sometimes bound with a small amount of rice flour porridge or a sweetener to help it cling to the leaves. Other vegetables, daikon radish, spring onion, carrot, are usually cut and added at this stage rather than fermented on their own.
Assembly is by layeringPropagating a new plant by pinning a low, flexible stem into the soil while still attached to the parent, so it roots before being cut free. Full definition → and coating, not shredding and mixing. Rather than tossing everything together the way sauerkraut is worked, each leaf or cabbage piece is coated in the paste, along with the other prepared vegetables, and packed into the fermentation container in layers.
Method
- Quarter or thickly slice around 2kg of napa cabbage (or a substitute firm winter cabbage). Layer it in a large bowl or basin with salt worked between the leaves, roughly the same 2% figure used for sauerkraut is a sound starting point for the brining stage, adjusted upward slightly if you're using a plain saltwater soak rather than dry-salting, since some salt stays in the soaking water rather than on the cabbage. Leave for 1–2 hours, turning occasionally, until the leaves bend without snapping.
- Rinse the cabbage two or three times in cold water to remove excess surface salt, then drain well and squeeze out any pooled water.
- Prepare the other vegetables, daikon and carrot cut into matchsticks, spring onion sliced into lengths, and set aside.
- Make the paste: a workable home-kitchen starting ratio is around 4–6 tablespoons of gochugaru, several cloves of garlic and a thumb of ginger (both finely grated), and a tablespoon or two of fish sauce (or a vegetarian alternative such as soy sauce), loosened with a little of the reserved soaking liquid or water into a thick, spreadable consistency. Treat this as a starting point to adjust to taste rather than a fixed ratio, start lighter on the chilli if you're unsure, since it's easy to add more but not to take away.
- Wearing gloves, massage the paste into the drained cabbage and other vegetables until every piece is coated.
- Pack tightly into a clean fermentation container, pressing down as you go so the vegetables' own liquid rises above the surface, and weight down if needed so everything stays submerged, exactly as with sauerkraut.
- Leave at room temperature for a day or two to get fermentation going, then move somewhere cooler to continue more slowly. Check every few days for the same normal-versus-spoiled signs as sauerkraut.
- Once it tastes pleasantly sour, move it to the fridge, where it will keep for months, continuing to develop flavour slowly.
Gochugaru and fish sauce are usually easiest to find at an Asian or international supermarket, or online, rather than an ordinary UK supermarket spice aisle.
What's identical
Once assembled, kimchi still needs the same salt discipline and the same submersion rule as sauerkraut, the paste and vegetables release enough liquid to form their own brine, and that liquid has to stay above the batch, weighted down the same way if it isn't doing so on its own.
The signs of a working versus a failed batch are also identical: cloudiness in the liquid, bubbling, and a growing tang are normal; pink or orange mould, a putrid smell, or sliminess mean the batch is spoiled and should be discarded, exactly as with sauerkraut. One genuine difference in timing: kimchi is usually fermented at room temperature for just a day or two, then moved somewhere cooler to slow down and develop flavour over the following weeks, a much shorter initial room-temperature stage than sauerkraut's full three-to-six weeks.
Common questions
Do I need any special equipment to ferment vegetables at home?
No. A clean glass, food-grade plastic, or stoneware container, something to weight the vegetable down under the brine, and a kitchen scale for measuring salt accurately are all that's required. Purpose-made fermentation crocks and weights are convenient but not necessary to get a safe, successful result.
Can I use ordinary table salt instead of pickling or canning salt?
Plain salt without additives works. What to avoid is iodised salt and salt with anti-caking agents, both of which can interfere with fermentation or cloud the brine unnecessarily. Fine sea salt without additives is a reasonable substitute for canning salt.
My sauerkraut has a thin white film on top of the brine, is that the mould I should discard it for?
A thin white film sitting only on the surface of the brine is usually kahm yeast, which is unsightly but not the same hazard as coloured mould. It can often be skimmed off, with the vegetable underneath still fine. Pink or orange mould, or mould that has developed on the vegetable itself rather than just the brine surface, is different and means the batch should be discarded.
How long does homemade sauerkraut or kimchi keep once it's fermented?
Once fermentation has completed and the batch is moved to the fridge, both will keep well for several months, continuing to develop flavour slowly in the cold. Always keep the vegetable submerged in its liquid during storage, and rely on the same spoilage signs, smell, colour, texture, to judge whether it's still good.
Is 2% salt the right amount for every vegetable I might want to ferment, not just cabbage?
It's a reliable starting point for cabbage-based ferments specifically. Other vegetables, and whole-vegetable ferments like pickled cucumbers, sometimes use a brine made up separately and poured over rather than salt worked directly into the vegetable, at broadly similar strength. Where a specific published recipe exists for a vegetable, its salt quantity should take precedence over a general rule of thumb.
Sources
4 sources, recorded with what each was used for
- National Center for Home Food Preservation: General Information on Fermenting: The role of salt in favouring desirable bacteria over spoilage organisms, and the guidance against reducing salt below the level a recipe specifies
- National Center for Home Food Preservation: Sauerkraut recipe: The salt-to-cabbage ratio, step-by-step method, temperature-vs-fermentation-time figures, and the "bubbling ceases" sign of a completed ferment
- National Center for Home Food Preservation: Suitable Containers, Covers, and Weights for Fermenting Food: Submersion depth, container sizing, and the plate-and-jar / water-bag weighting methods
- National Center for Home Food Preservation: Causes and Possible Solutions for Problems with Fermented Pickles: Spoilage indicators (softness, sliminess, discolouration), surface scum management, and the discard-if-spoiled guidance